Shopify how to invite users to your store - 2025 Guide
Learn how to invite users to your Shopify store with this step-by-step guide. Customize permissions, add staff, and streamline team collaboration.

Whether you're collaborating with a team, outsourcing tasks to freelancers, or bringing on new staff members, inviting users to your Shopify store is essential for managing your business effectively. Shopify offers a straightforward way to grant access to your store’s admin, enabling users to perform specific roles depending on the level of access they need. In this guide, we'll walk you through the process of inviting users to your Shopify store, ensuring that you can manage permissions with ease and keep your operations running smoothly. Let's dive in!
How to invite users to you Shopify store - Step by step guide
Step 1 - Enter the settings for your Shopify store
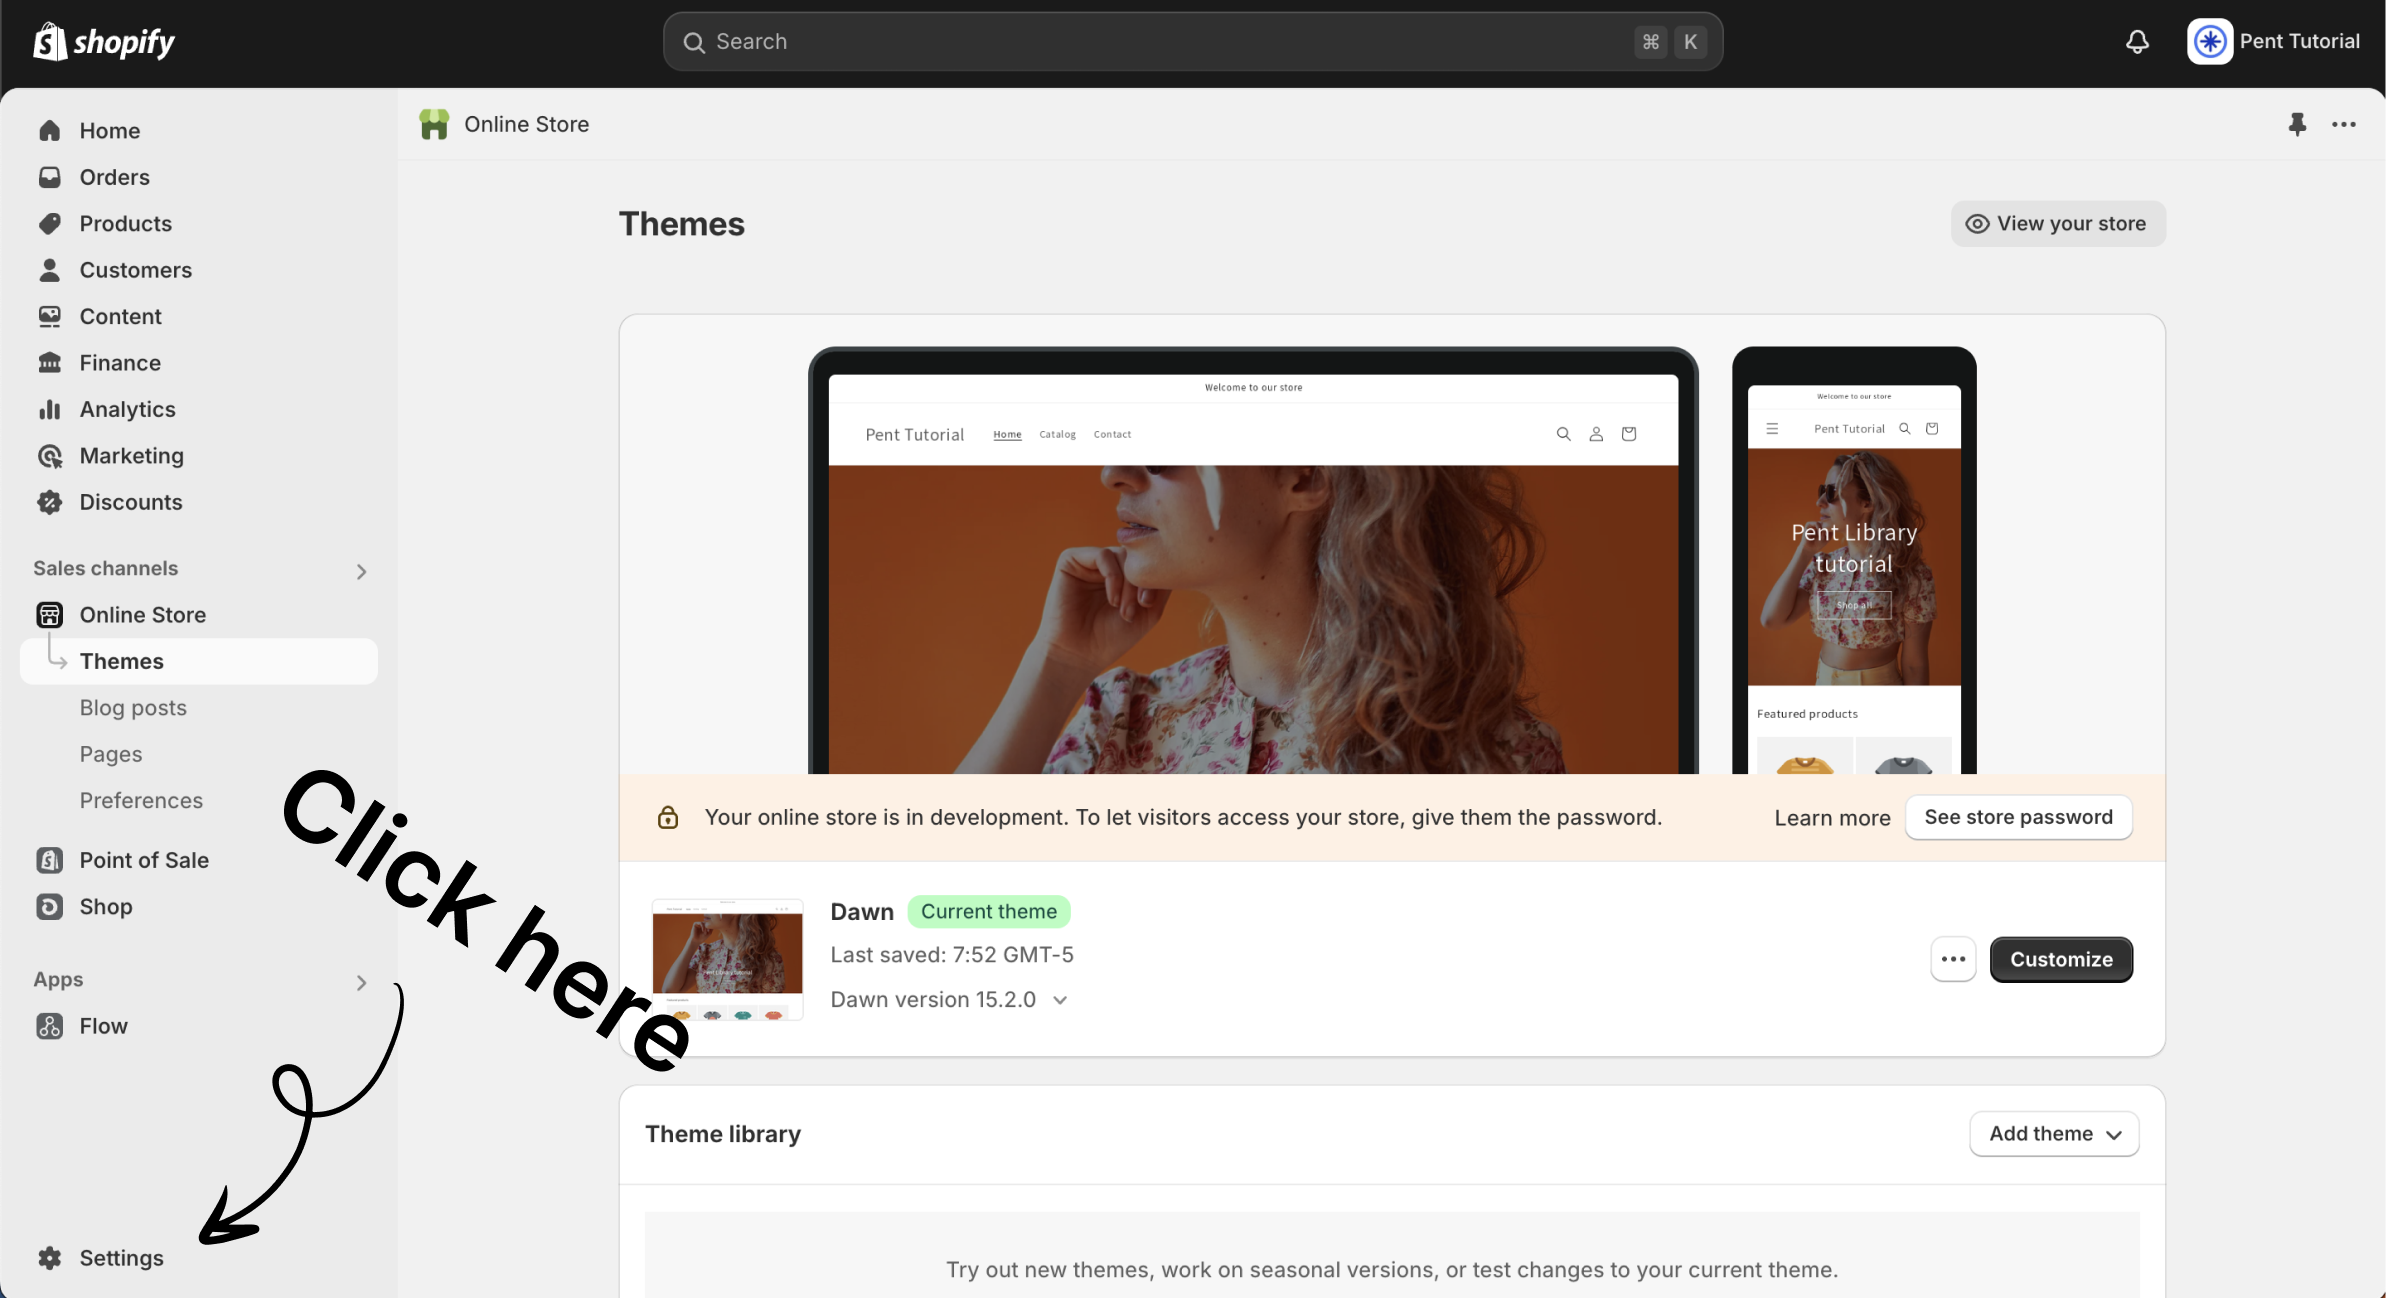
To access the settings for your Shopify store, click on the lower left corner. This will open the settings page, where you'll find a variety of options to configure and customize your store.

Step 2 - Go to users and permissions
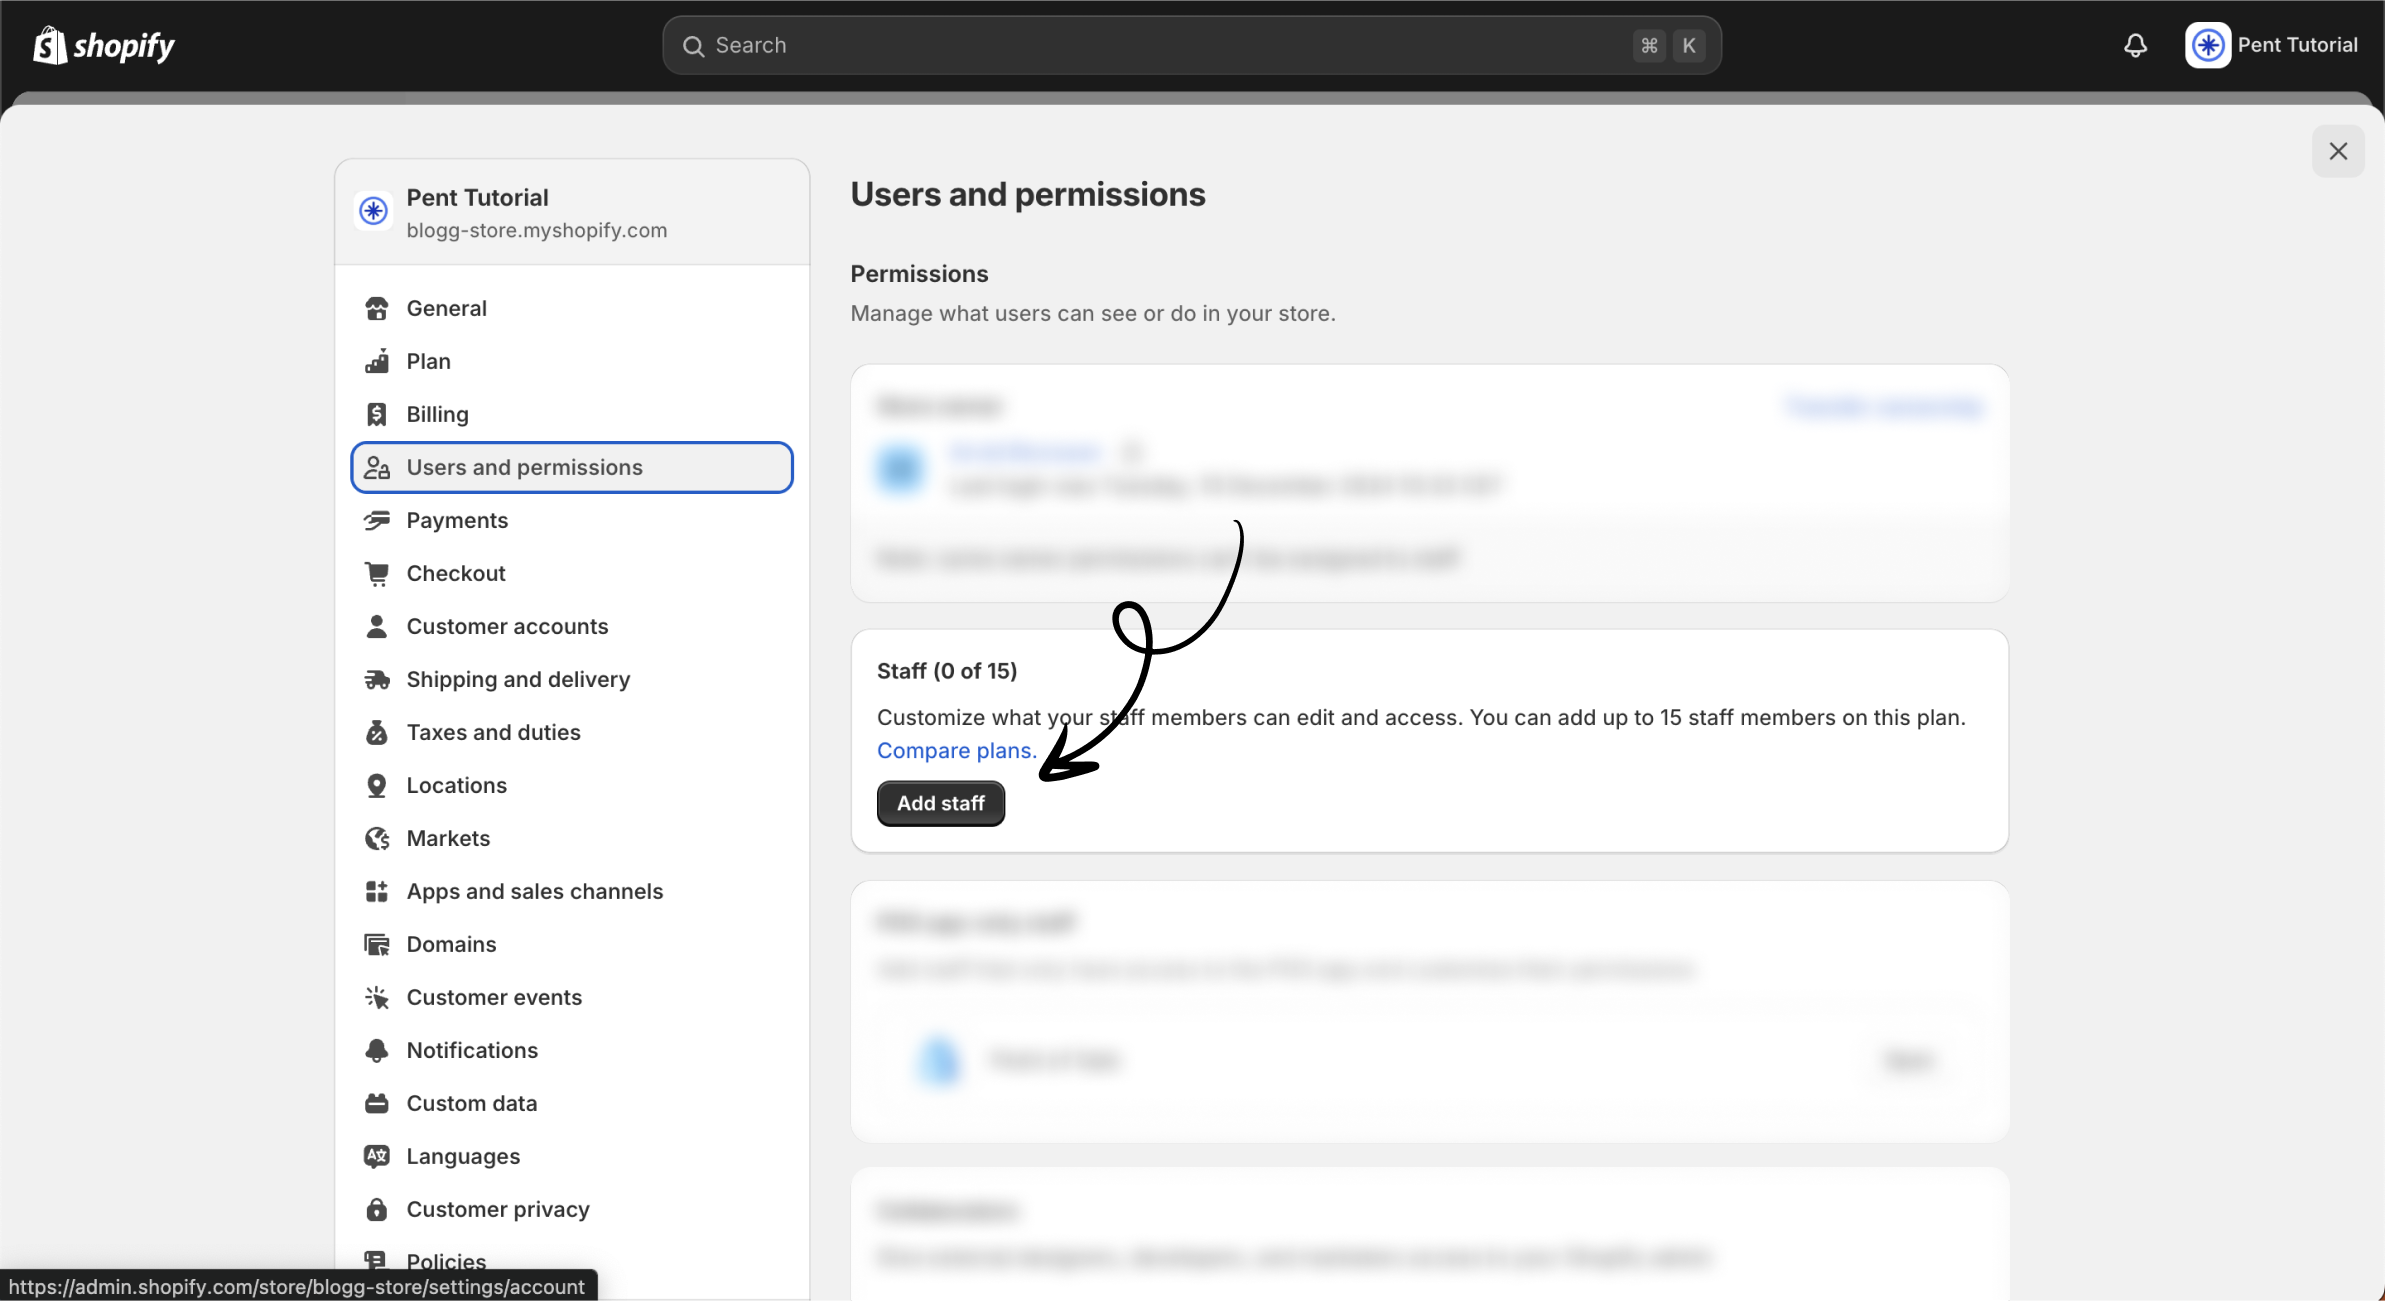
When you open your Shopify store's settings, you'll see a variety of options listed in the menu on the left. To invite users or staff to your store, select the option labeled "Users and Permissions", highlighted in green in the image below.

Step 3 - Click add staff
Once you've entered the Users and Permissions section of your Shopify store settings, you'll see a screen displaying general information about your store's users and the staff accounts currently connected. To add a new user, click the black button labeled "Add Staff".

Step 4 - Fill out the staff information
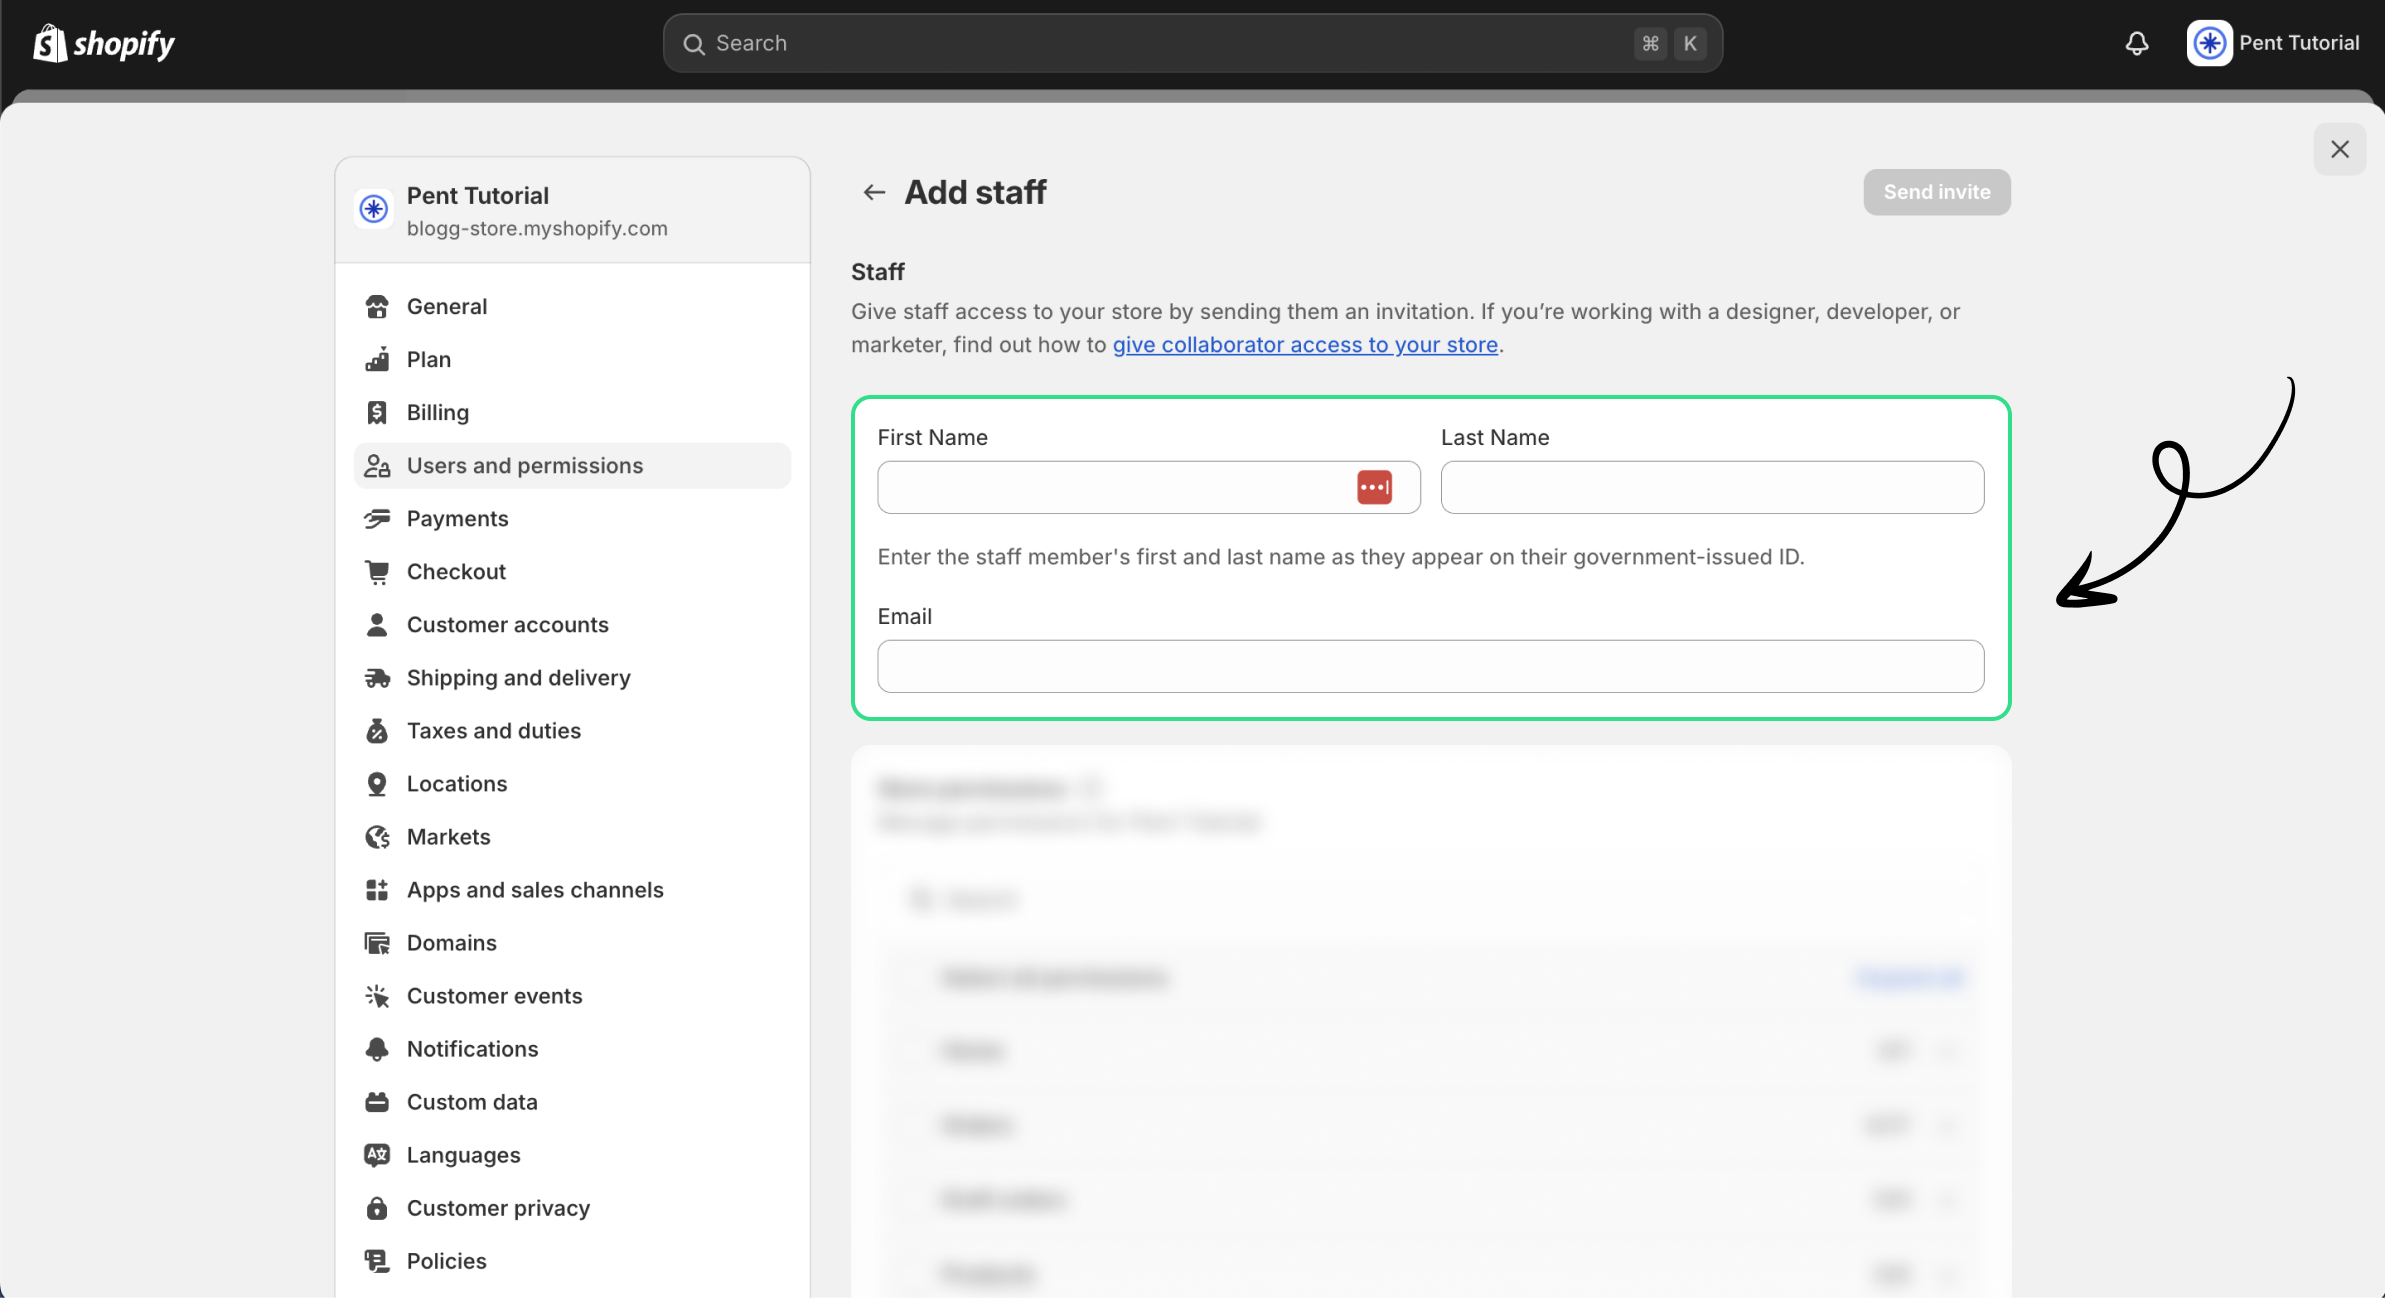
In the staff form, you'll be prompted to fill out three fields: the user's first name, last name, and email address. The email you enter here is where the invitation to your store will be sent, so ensure it's an active and accessible email to avoid the invite getting lost.

Step 5 - Selected what permissions the user should have
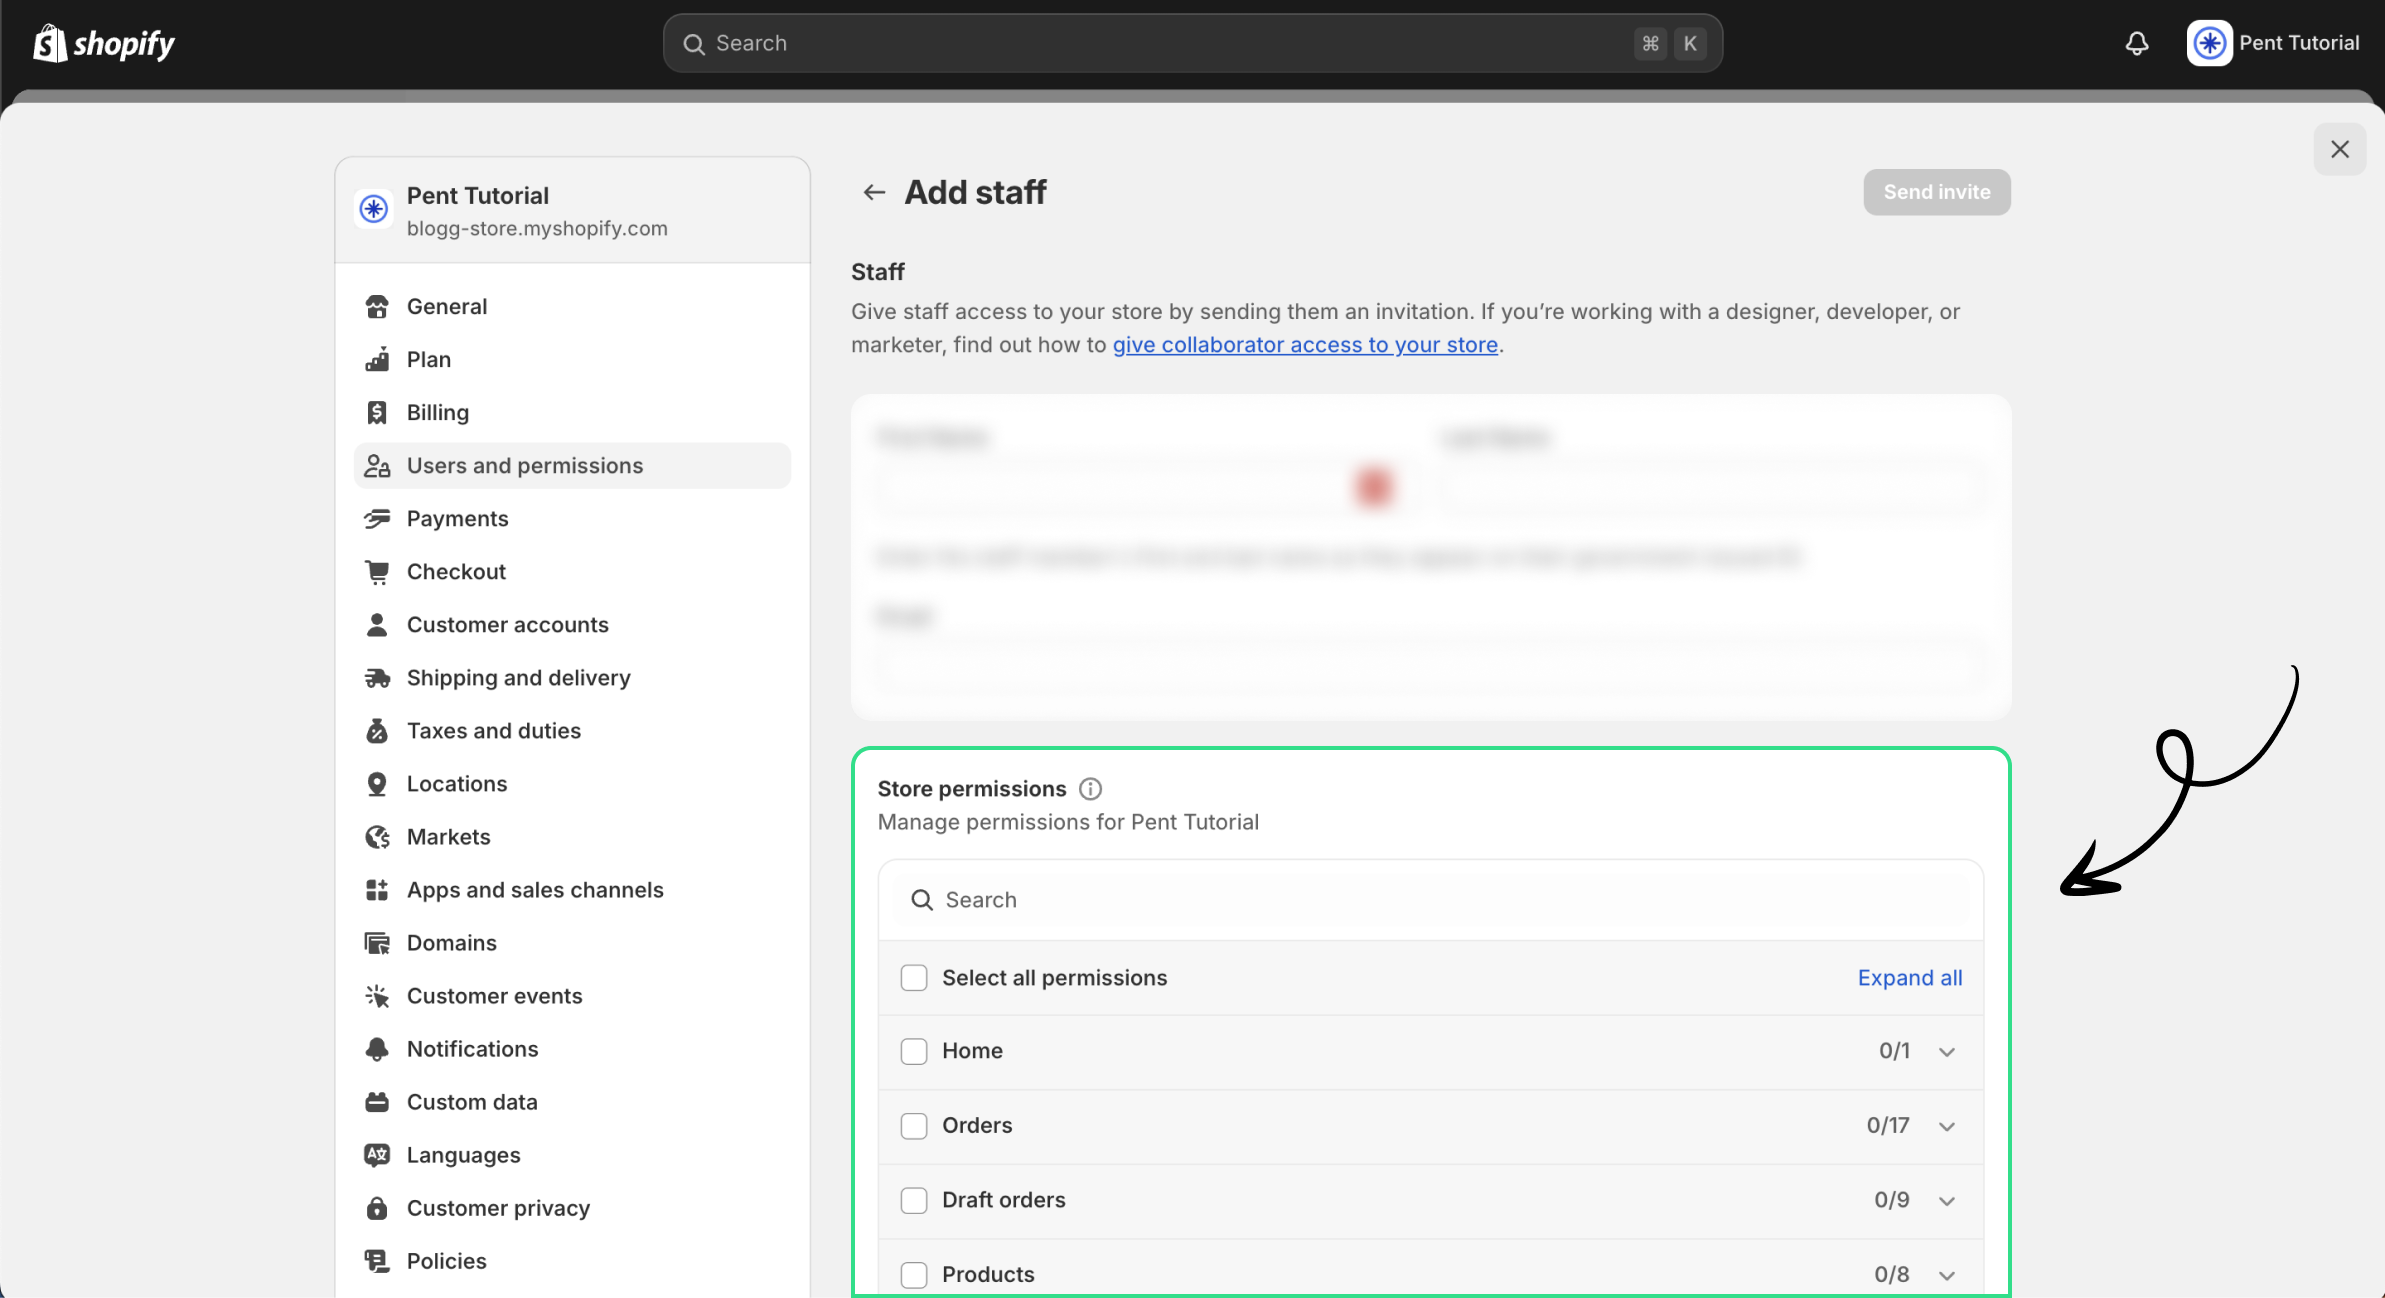
When inviting a user to your Shopify store, you can customize their permissions based on what tasks they need to perform. If you want the user to have full access, simply check the box labeled "Select all permissions." However, if the user is being invited for specific tasks, such as handling orders or managing particular areas, you can select only the relevant permissions. Shopify offers detailed options, so take your time to choose the permissions that best suit your needs!

Step 6 - Send the invite
Once you've completed the user form and selected the appropriate permissions, you're ready to send the invite! You'll find the Send Invite button in the bottom-right corner of the page. Since the permissions form is quite extensive, you may need to scroll down to locate it.
Step 7 - User accepts the invite
After sending the invite, the user will receive an email notifying them that they’ve been invited to your store. Keep in mind that this email might occasionally land in their spam folder, so be sure to remind them to check there if they don't see it in their main inbox!
The user simply needs to accept the invite, and they’ll be able to start working on your store within the permissions you’ve assigned to them. Great job! You’ve just added a new team member and strengthened your Shopify workforce. 😊
Psst quick tip!
If you want to take full control of your store's design and feel like a Shopify developer, check out our Pent Library. It offers pre-built theme sections that you can easily style to perfectly match your brand! You can read more here!
