Shopify how to send collaborator request - 2025 Guide
Learn how to send a collaborator request as a Shopify Partner with this step-by-step guide. Discover how to request access to a store, set permissions and more!
.png)
As a Shopify Partner, one of the most valuable features you have access to is the ability to collaborate directly with store owners. Whether you're helping a client with theme customization, app integrations, or other store management tasks, sending a collaborator request is essential for gaining the necessary access to their Shopify store. In this guide, we'll walk you through the simple process of sending a collaborator request to a Shopify store, so you can start working on projects without the need for sharing sensitive login credentials. Let’s get started!
How to send a Shopify collaboration request - Step by step guide
Step 1 - Login to your Shopify partner dashboard
To send a collaboration request, you first need to log in to your Shopify Partner Dashboard. Here, you'll be able to view your development stores and any other stores you already have access to.
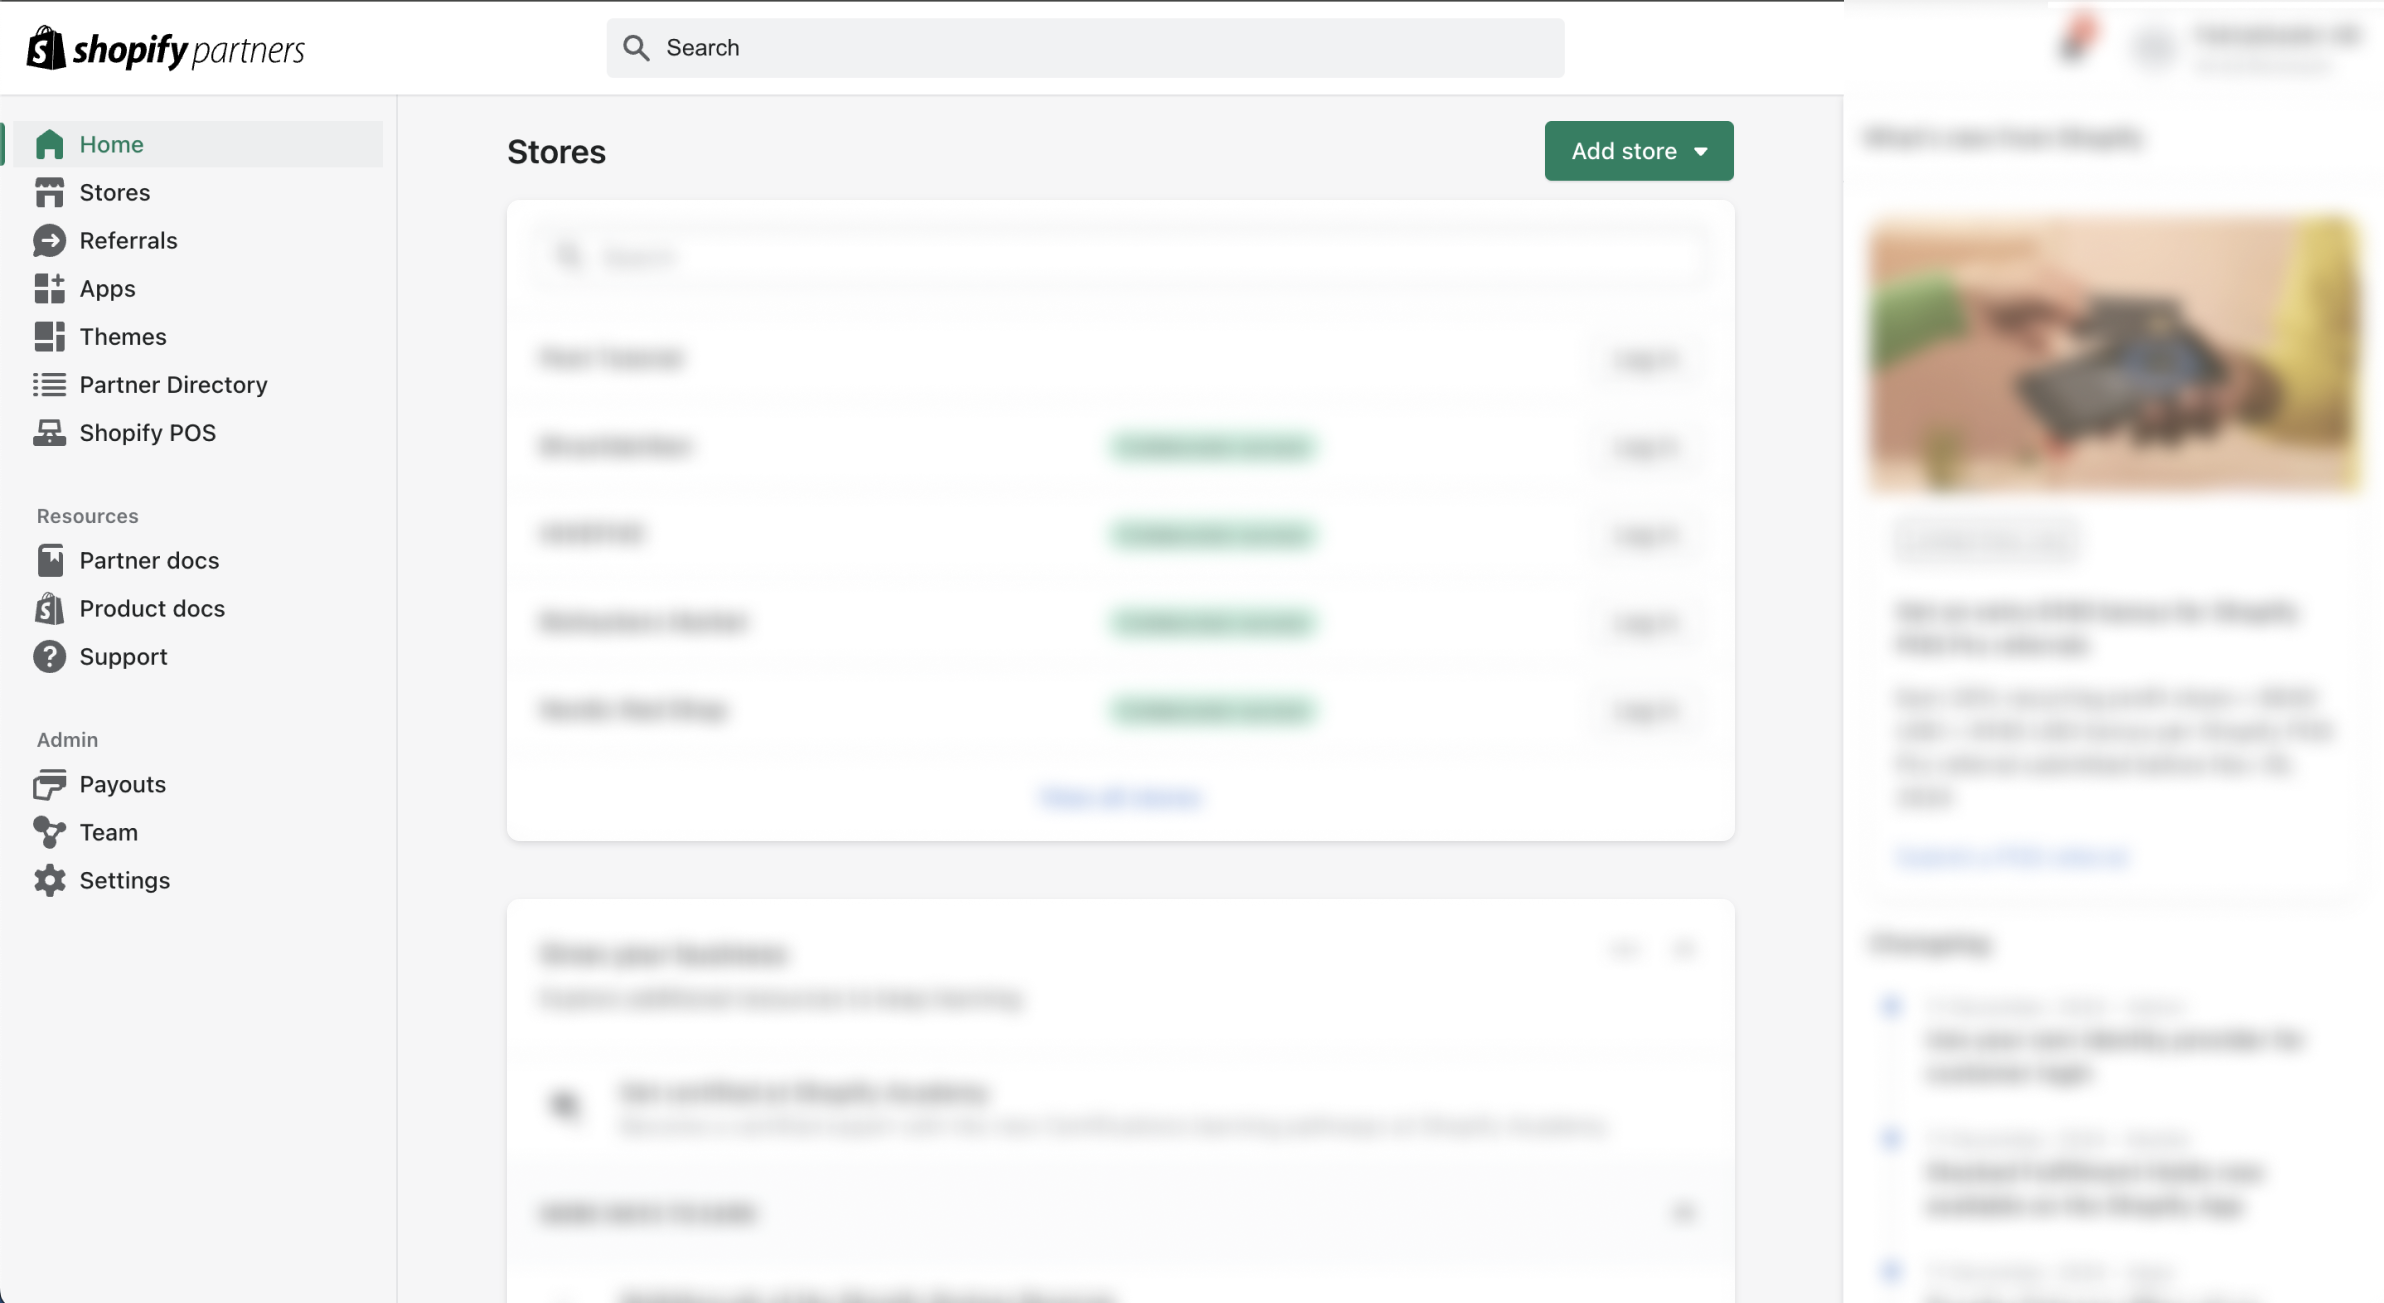
Step 2 - Click "Add store"
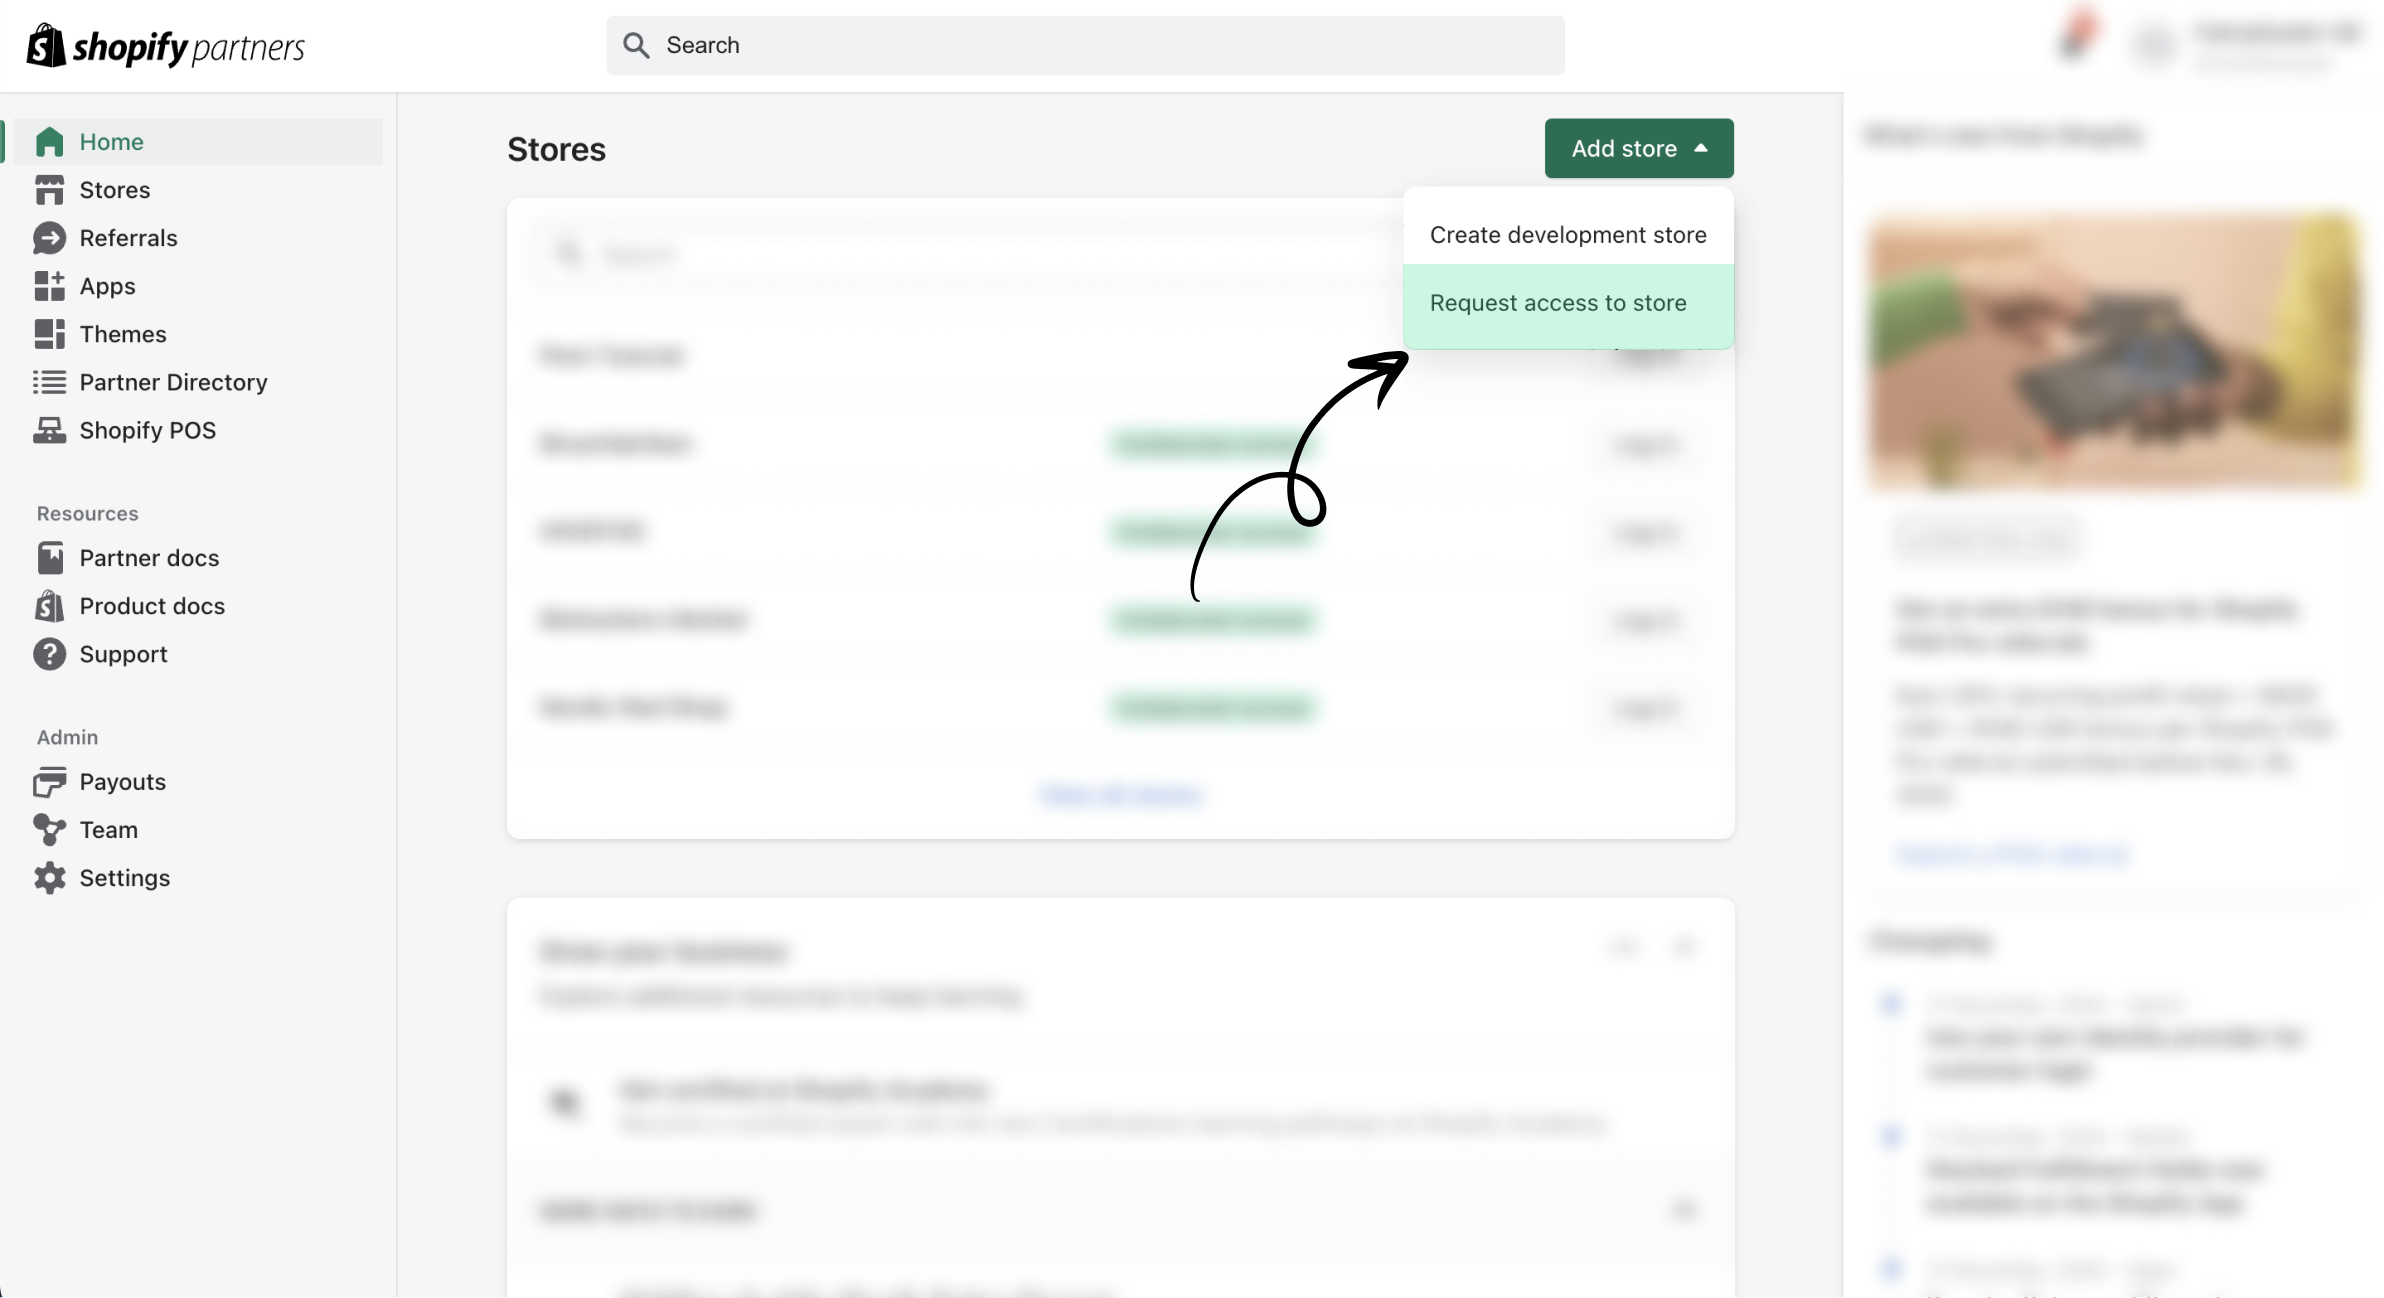
Once you're logged into your Partner Dashboard, click the green "Add store" button. This will open a dropdown menu with two options:
- Create development store
- Request access to store
Since we're looking to request access to a store, go ahead and select that option! You'll find it highlighted in the image below.
Step 3 - Enter the MyShopify URL
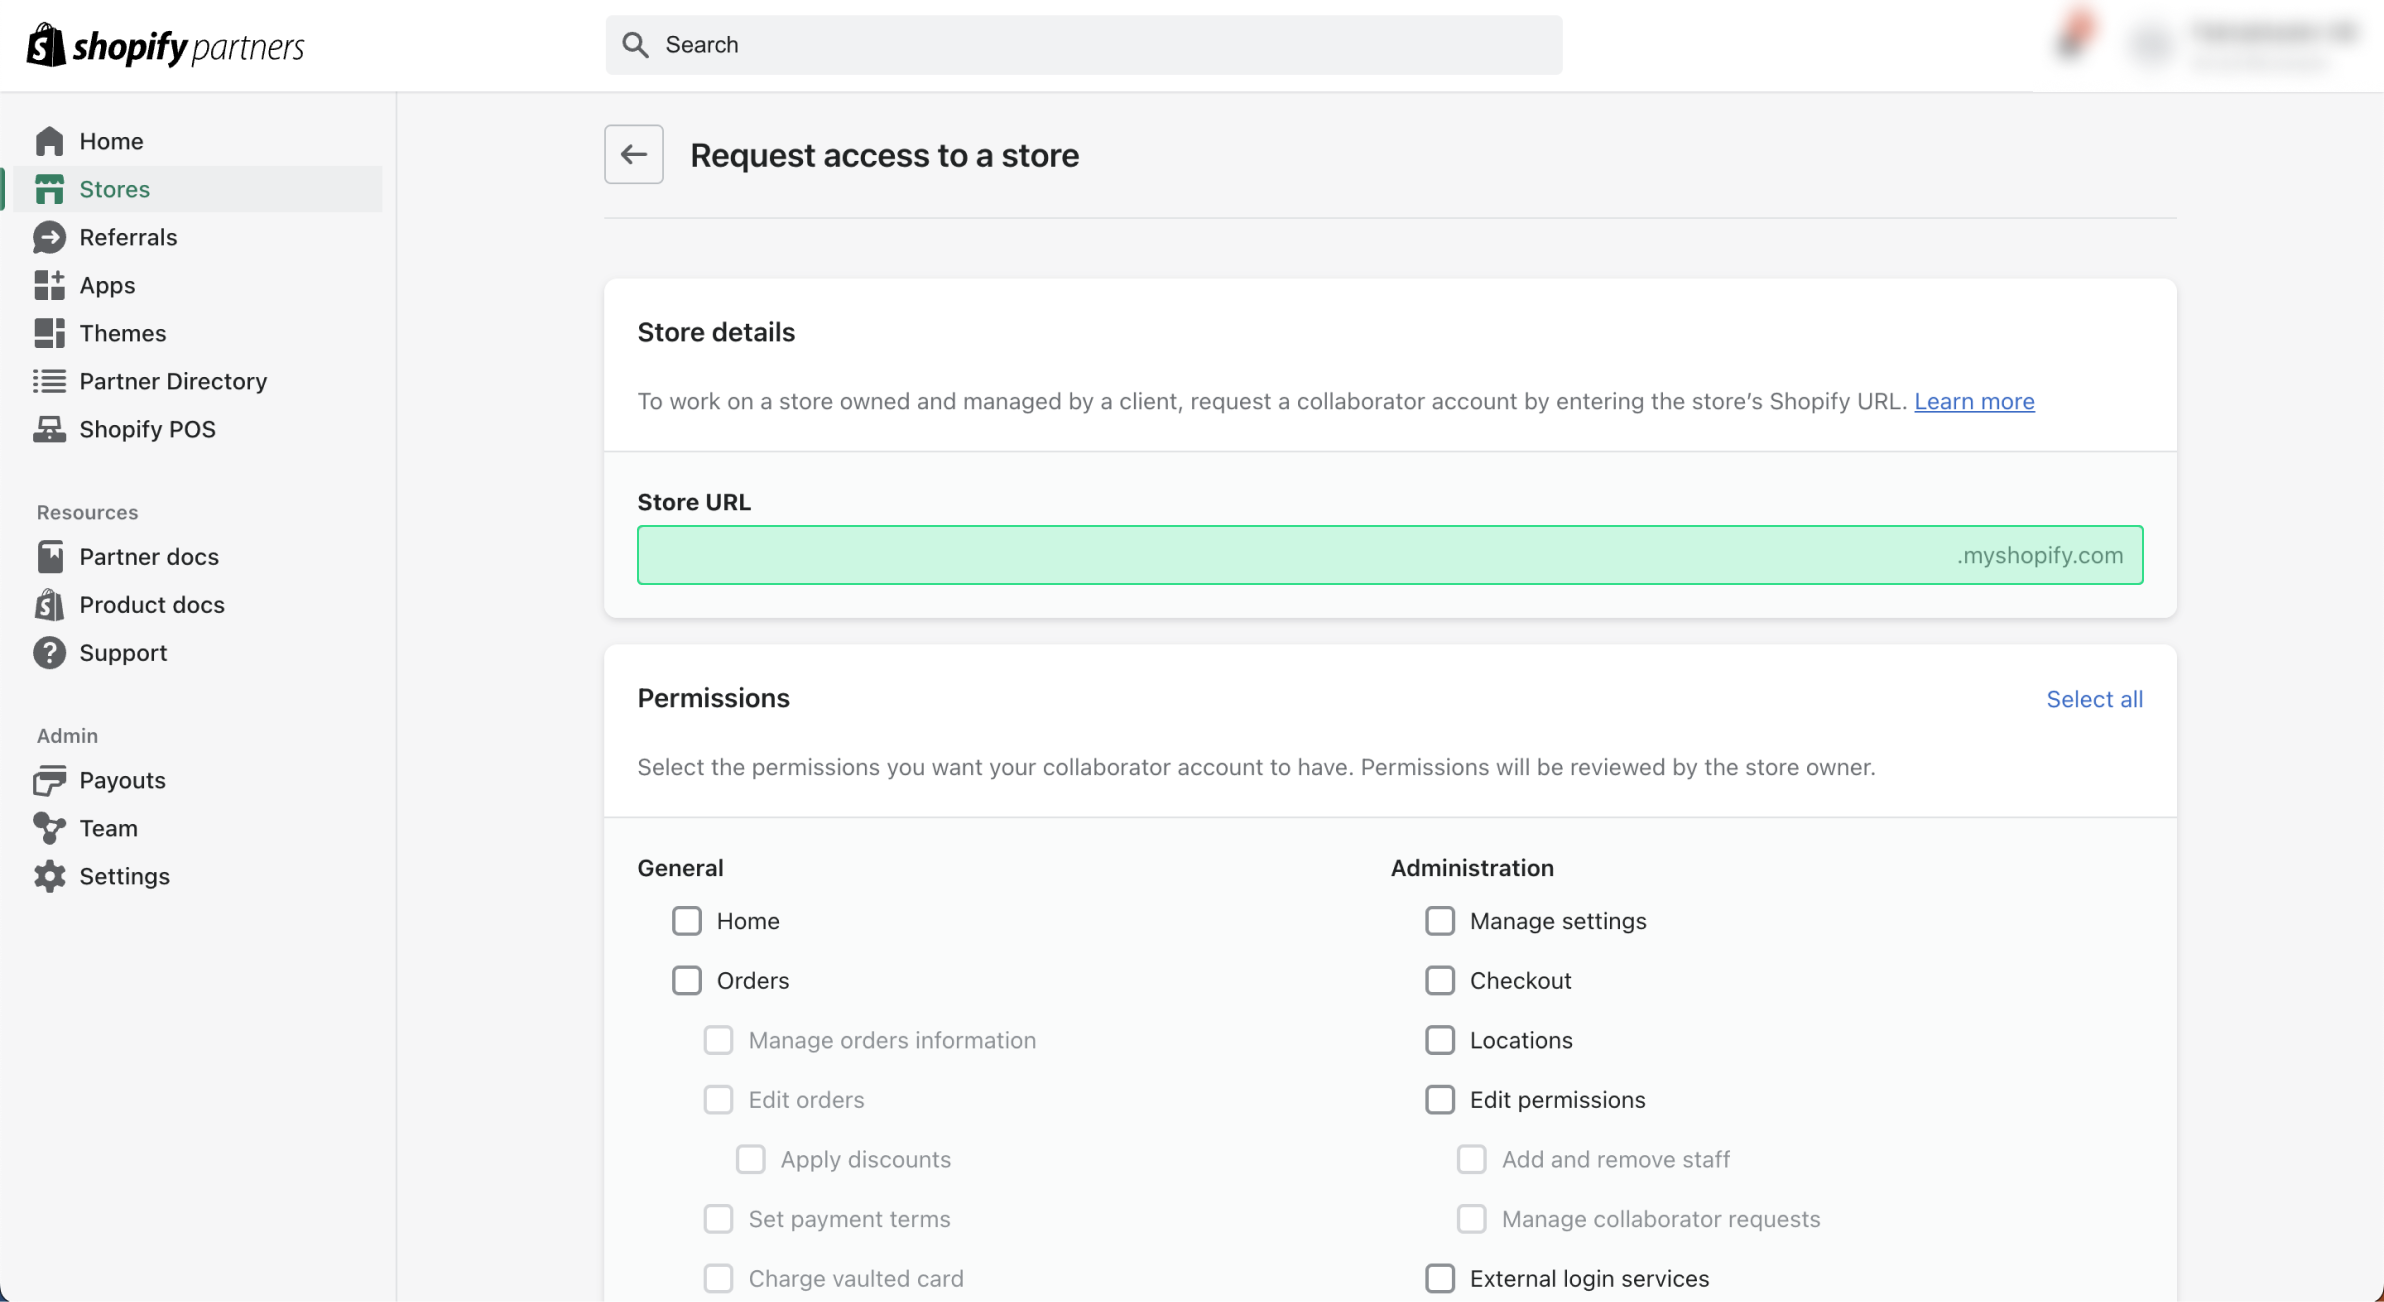
After clicking "Request access to store," you'll be taken to a form where you'll need to provide information about the store you want to access. The first field asks for the MyShopify URL of the store you're requesting access to. You can see this field highlighted in the image below.
You don't have the MyShopify URL? (Skip this if you have filled it in)
If you're unsure of the MyShopify URL, you can ask the store owner to follow these steps to locate it:
1. Enter the store settings:
Navigate to the store settings by selecting the settings icon located in the bottom-left corner.
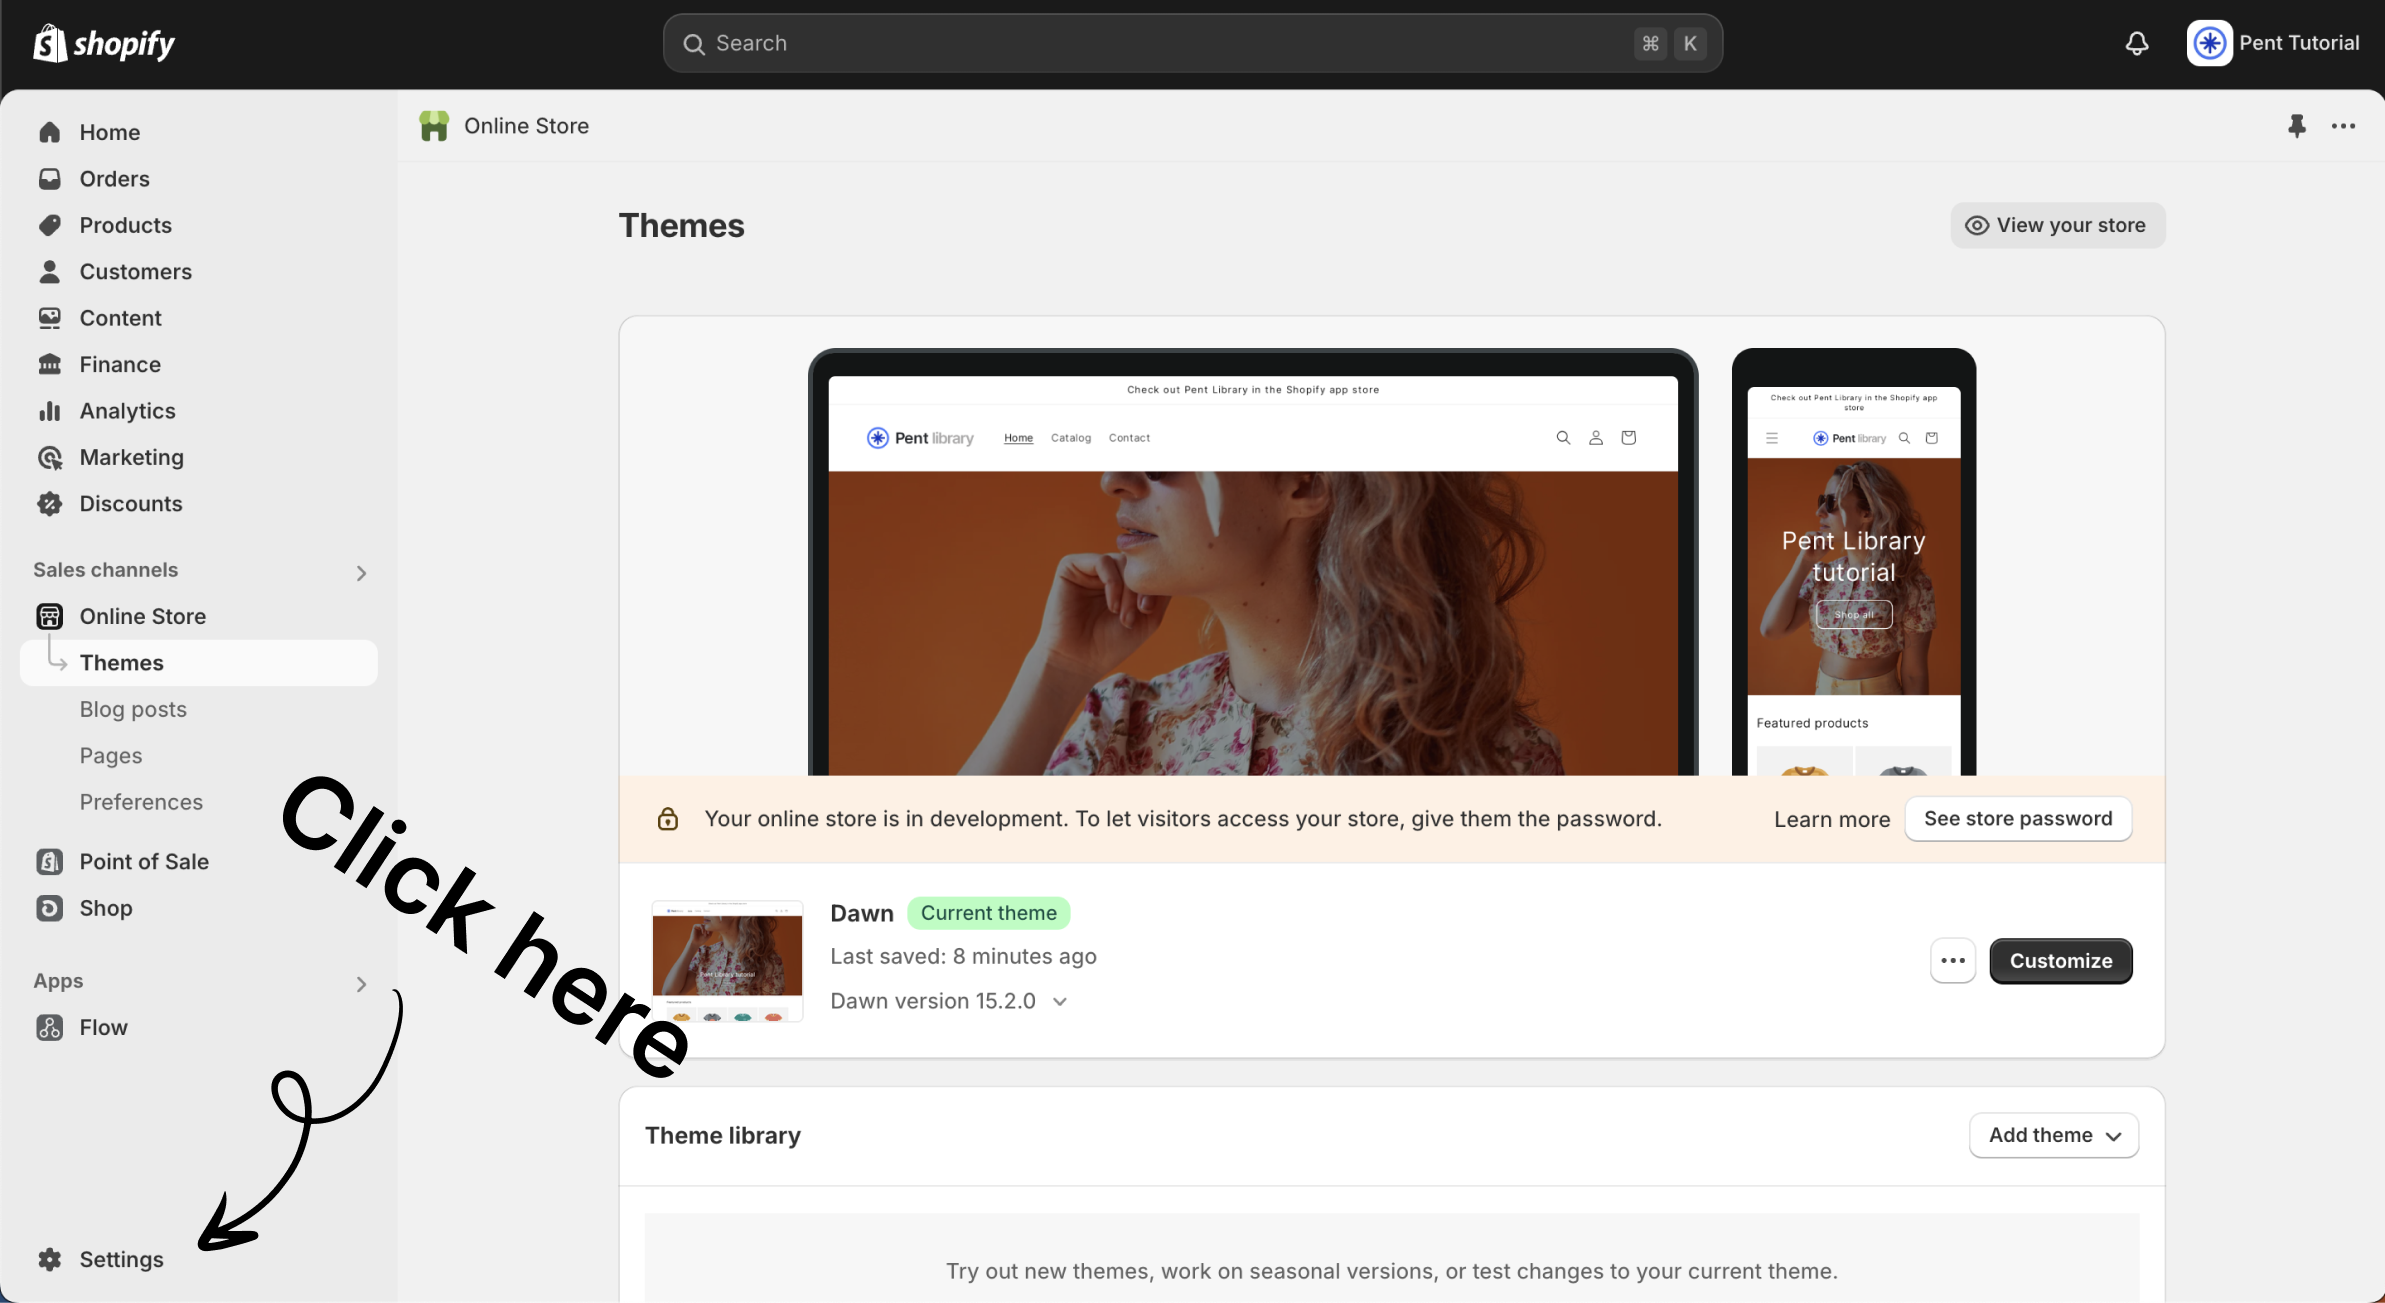
2. Copy the MyShopify URL:
Once the store settings are open, the MyShopify URL can be found in the top-left corner of the displayed menu. Refer to the image below for guidance!
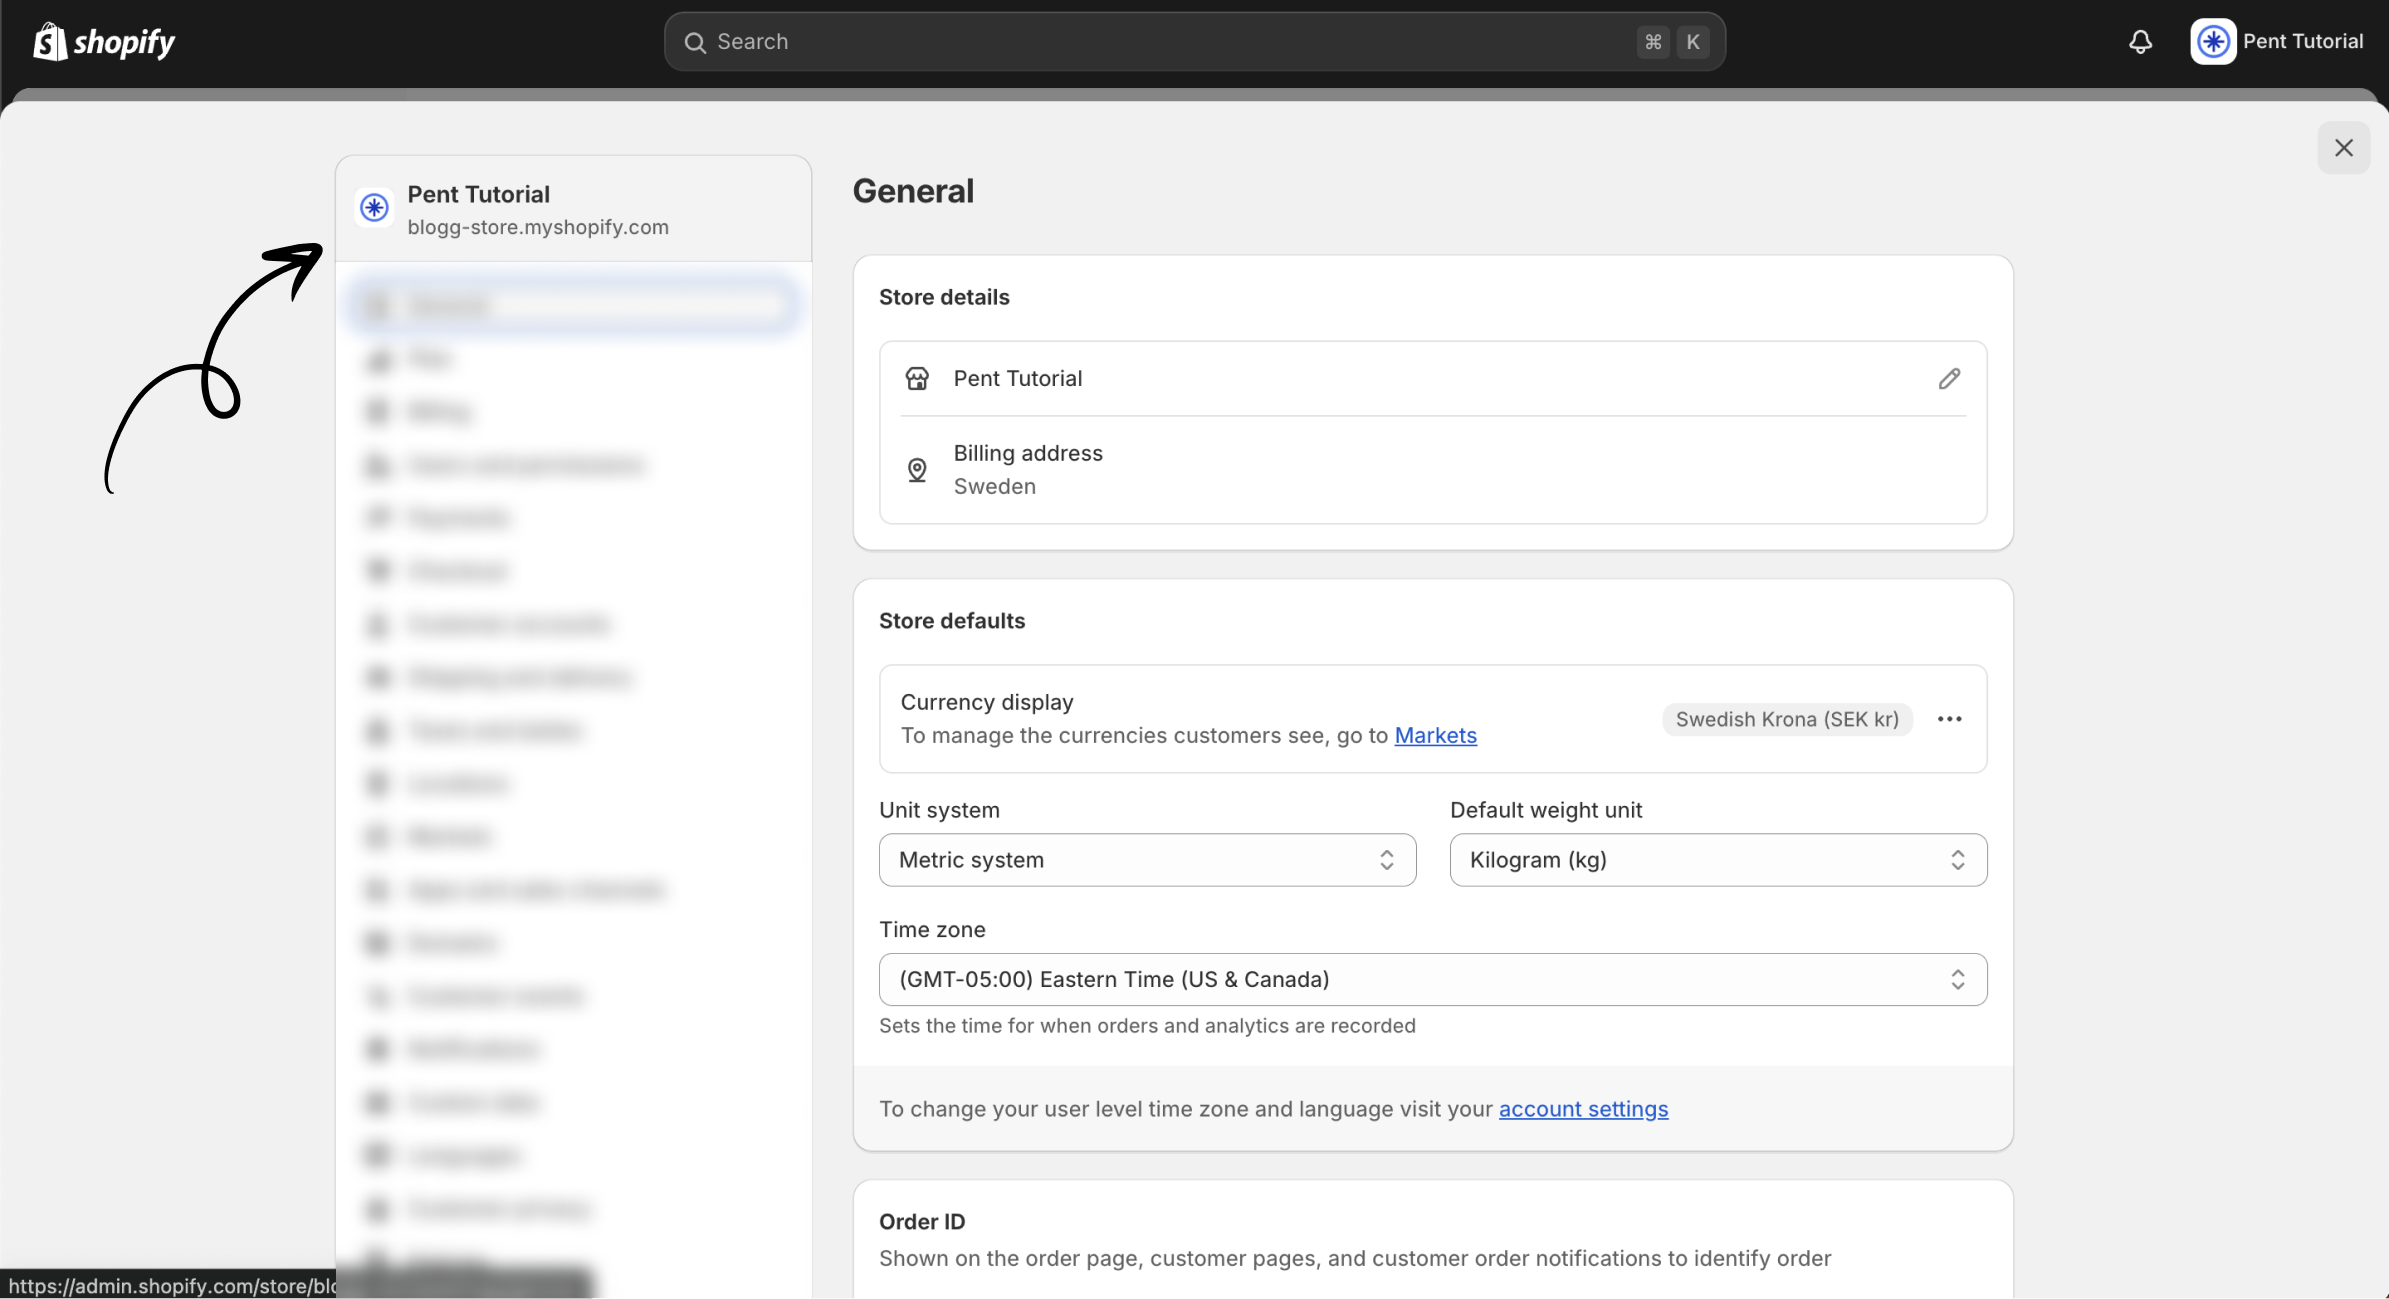
Now that you have the MyShopify URL we can continue with the store access request form!
Step 4 - Choose permissions
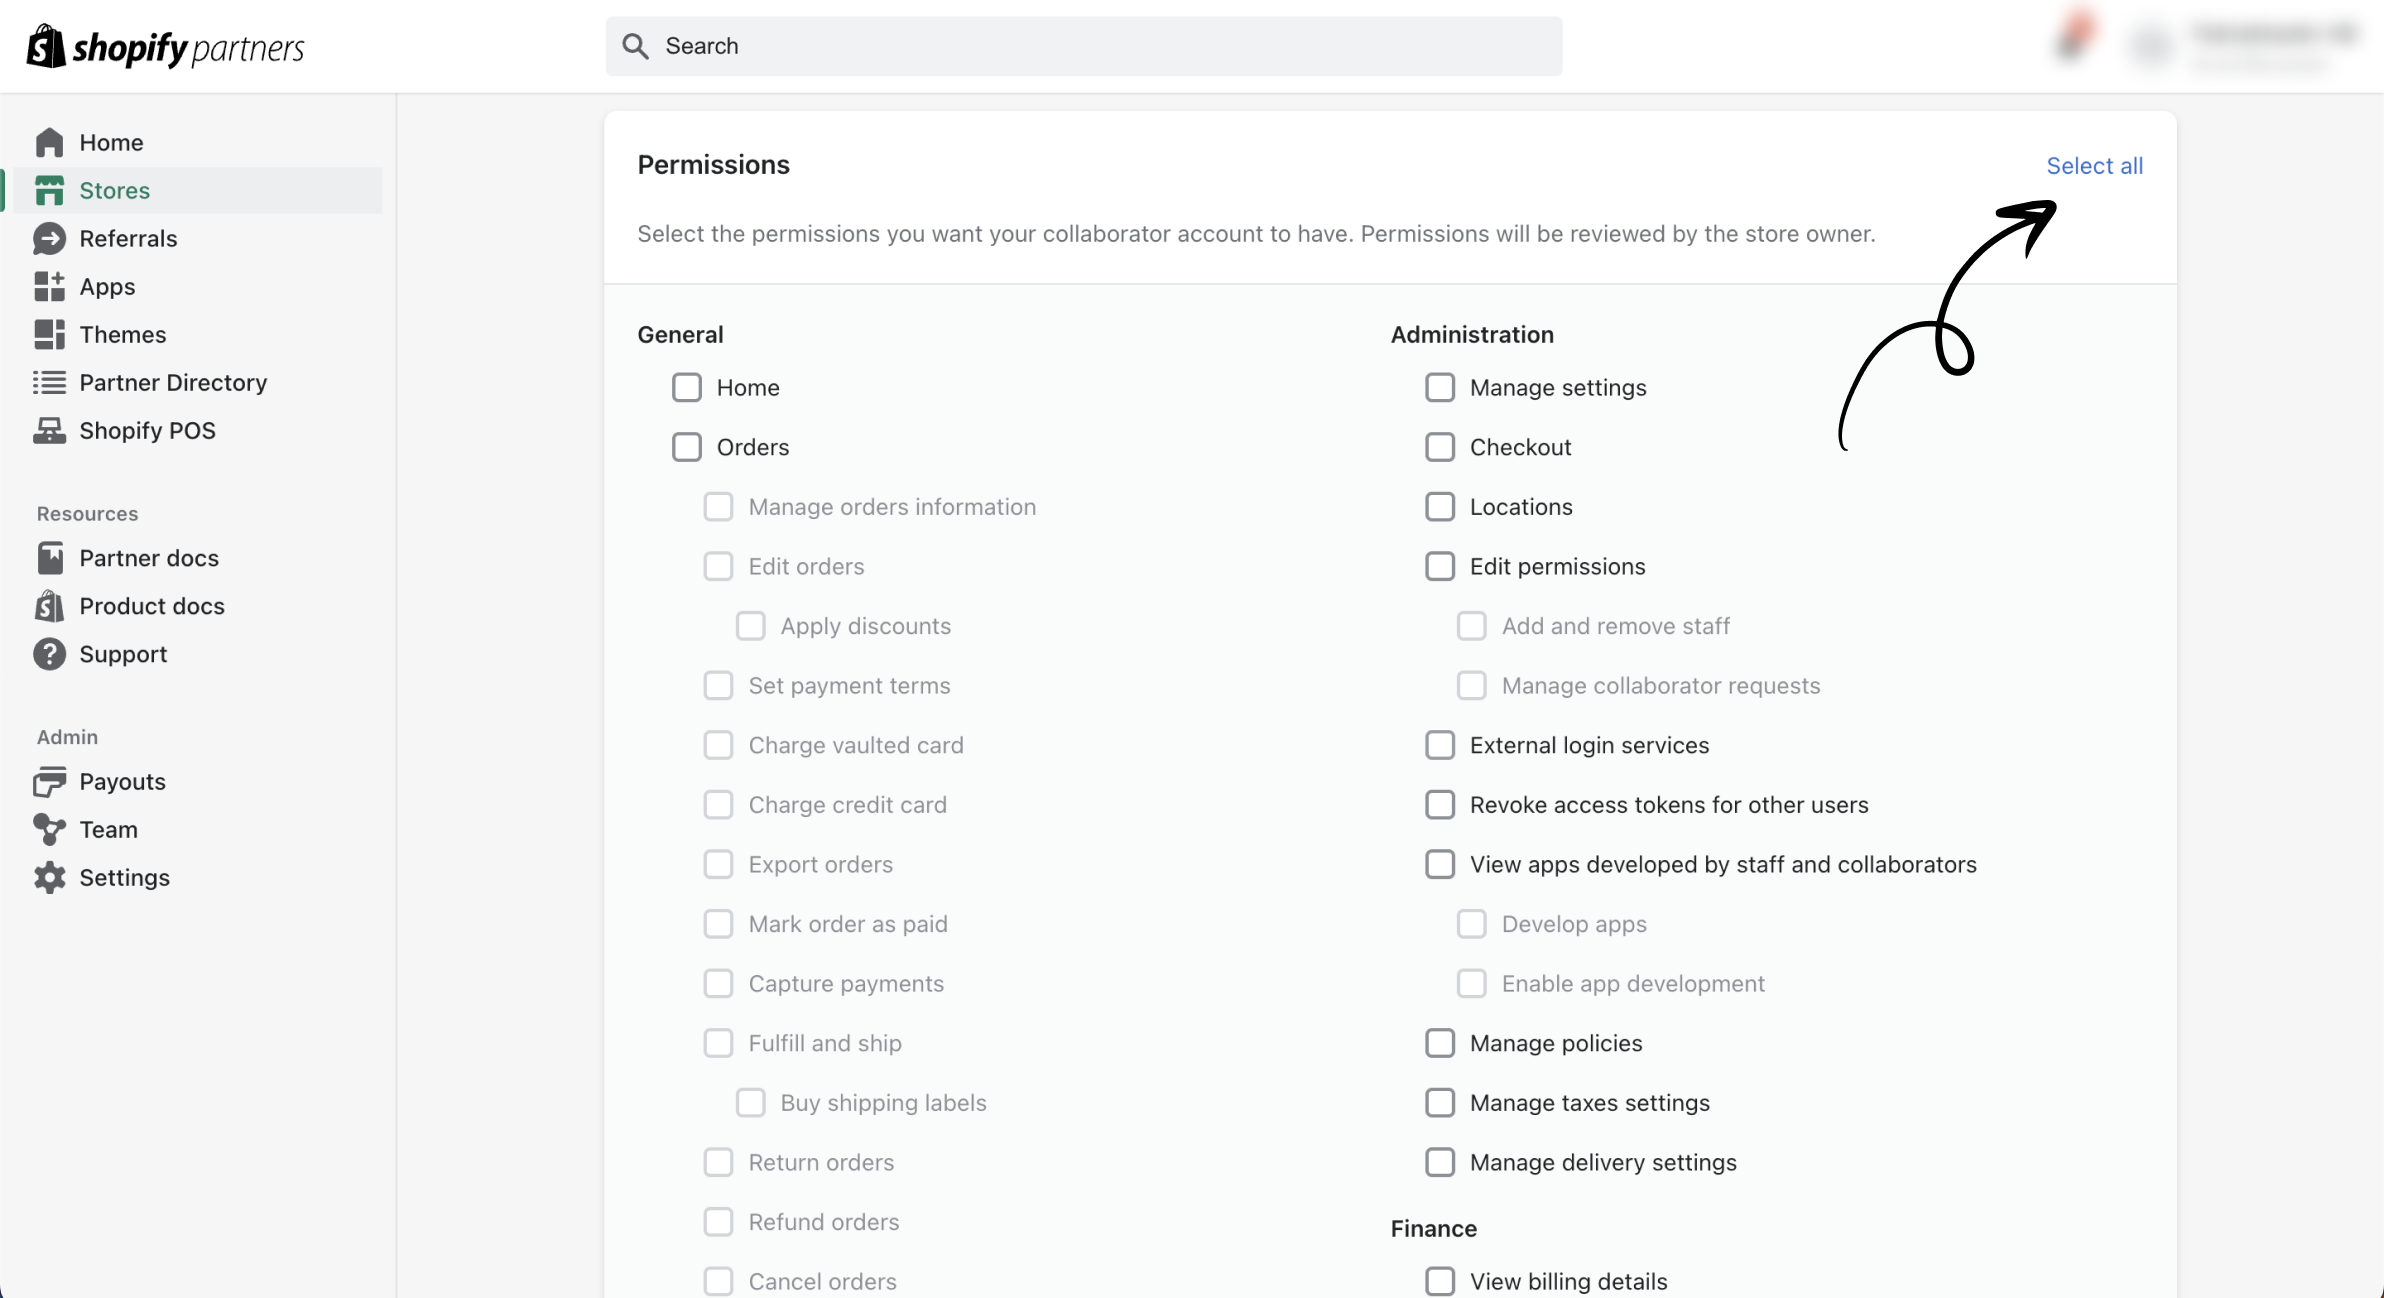
After entering the MyShopify URL, scroll down to select the permissions you need to complete the tasks agreed upon with your client or the Shopify store owner. If you need access to all available permissions, you can click the blue "Select all" button in the top-right corner. Refer to the image below for further assistance!
Step 5 - Type a message
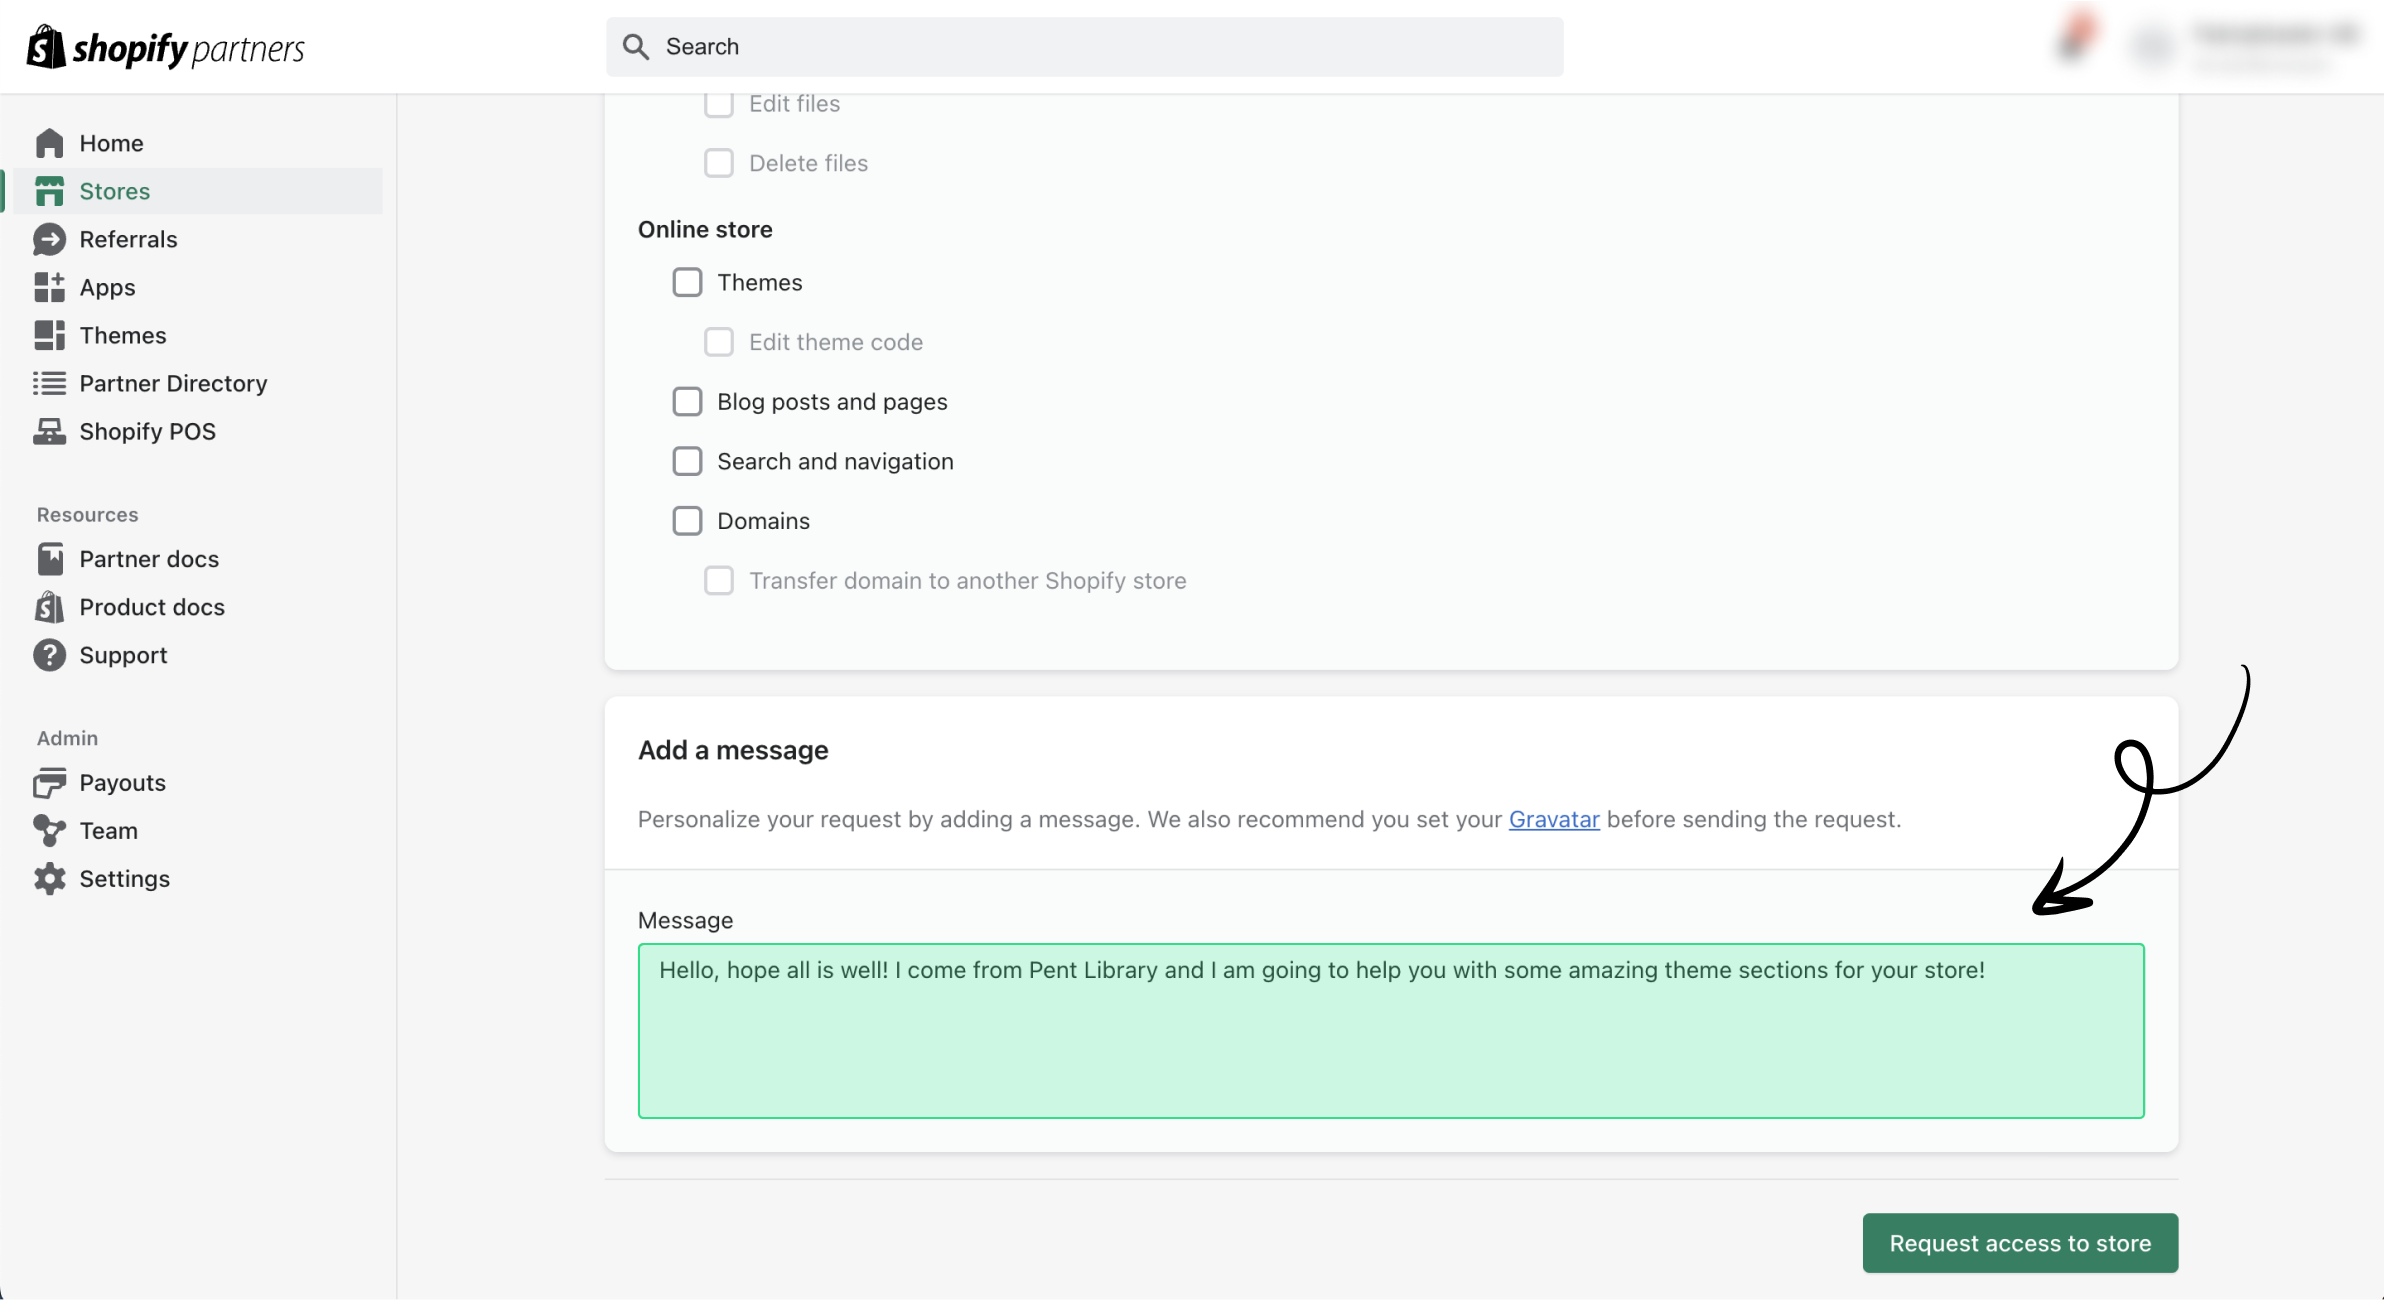
Once you’ve selected the necessary permissions for your work, scroll down to find an optional message box. While it’s not required, I highly recommend filling it out with your name and a brief explanation of why you need access to the store. This helps the store owner identify you and approve your request without any confusion or questions!
Step 6 - Send the request!
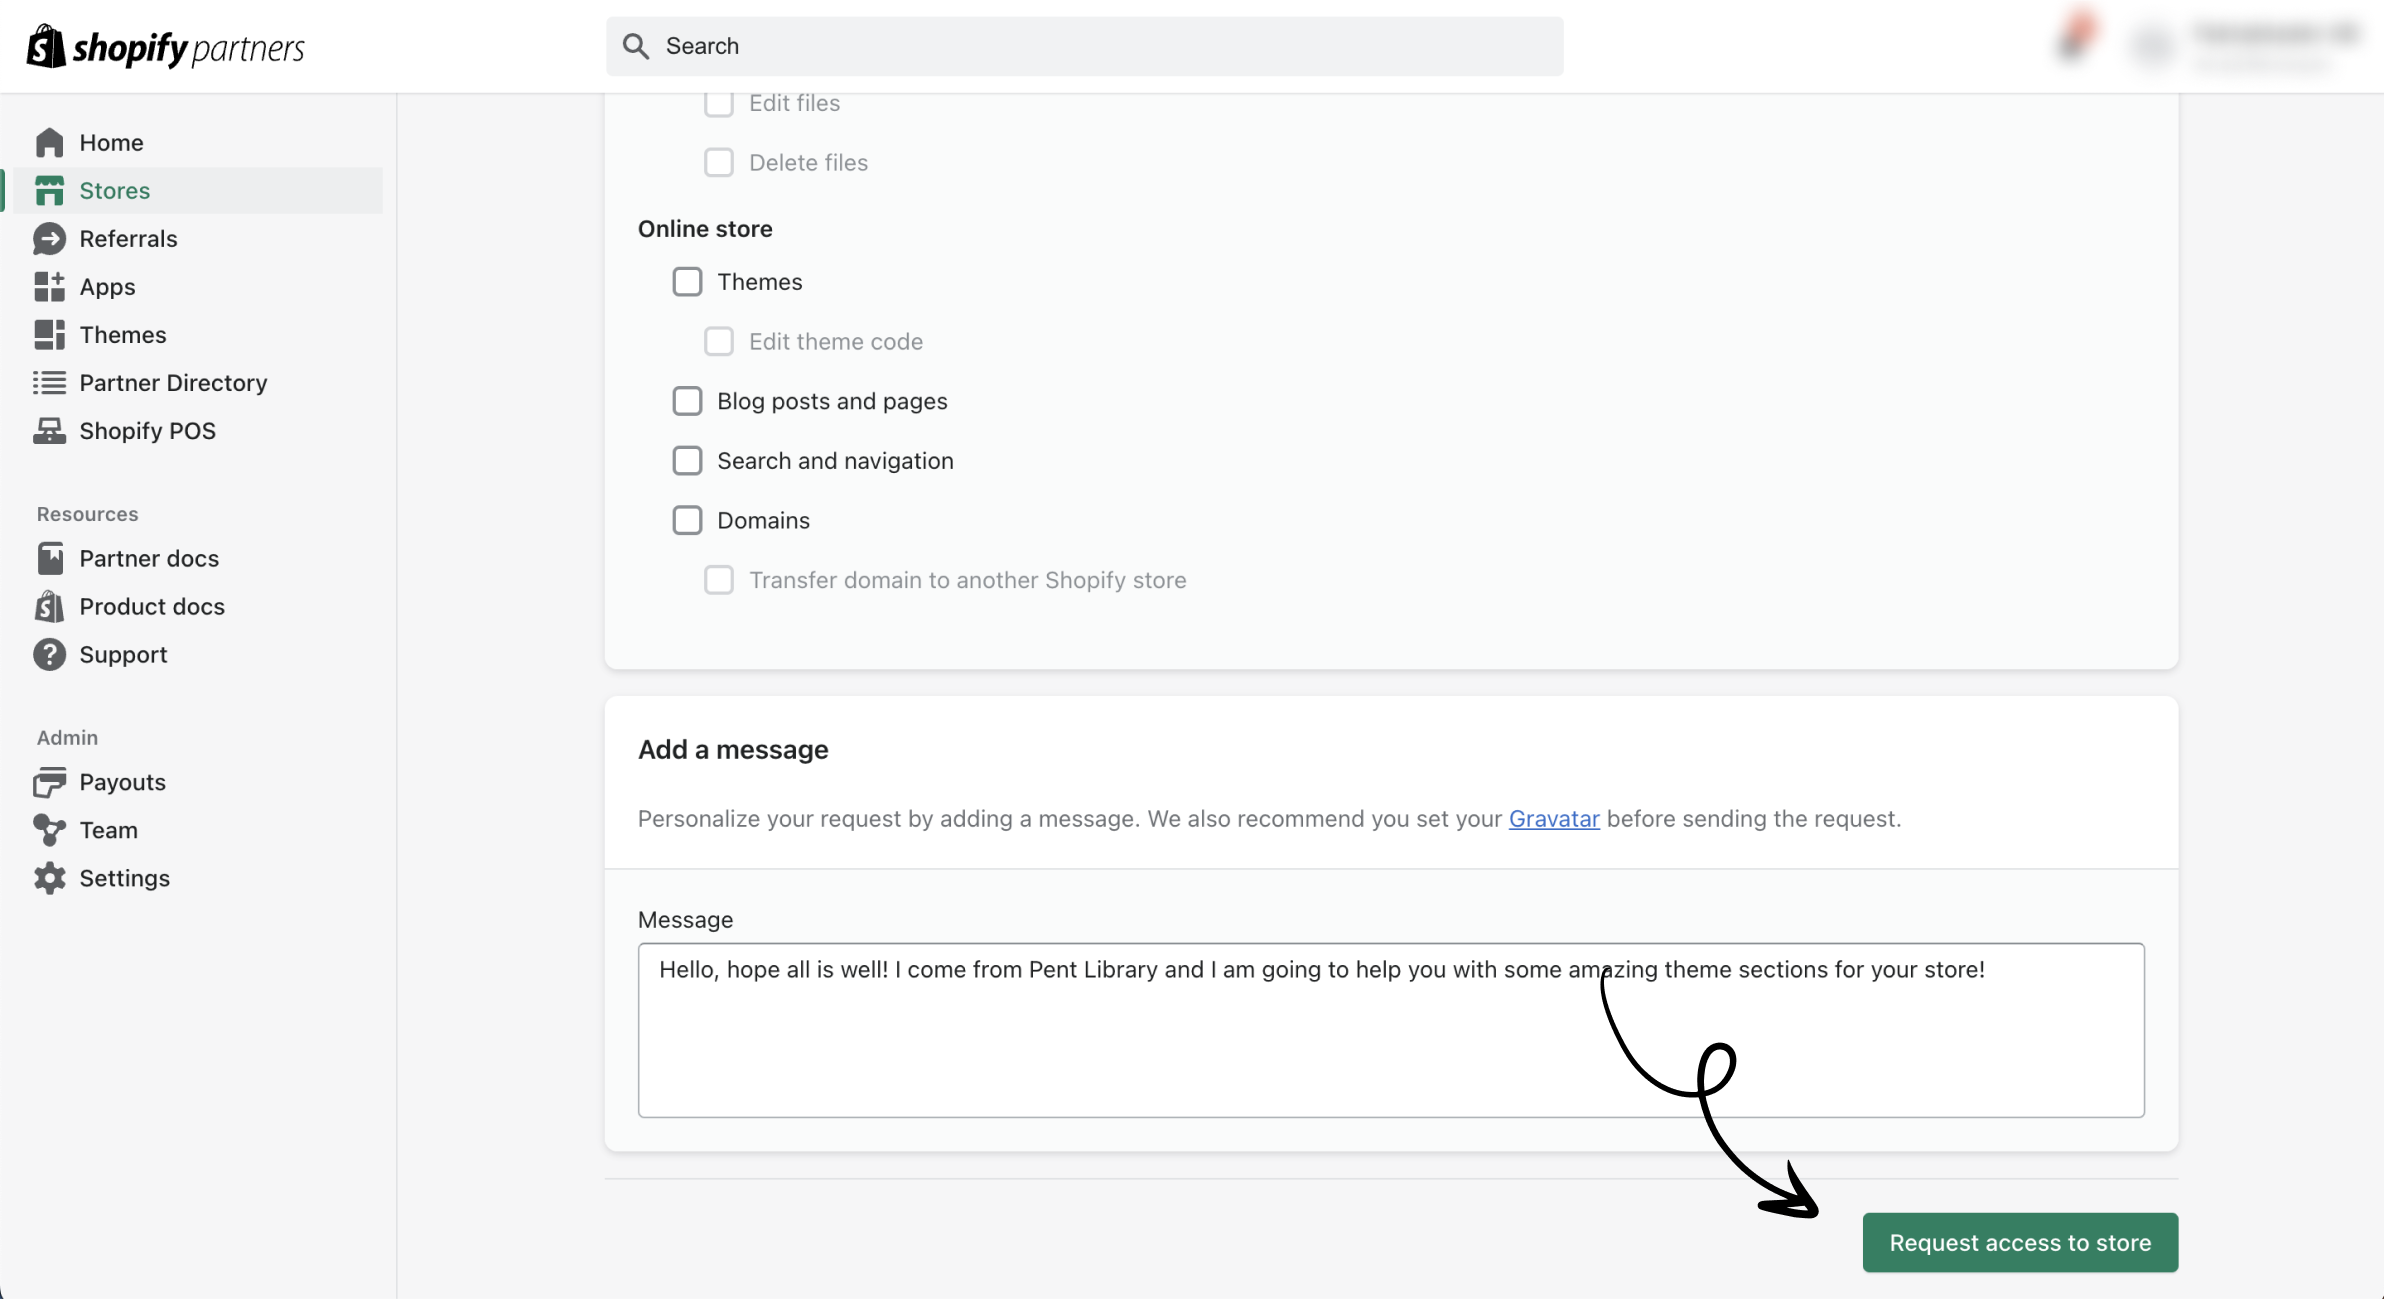
Once you’ve completed all the steps above, you’re ready to request access to the store! Simply click the green button at the bottom of the form labeled "Request access to store."
Step 7 - All good to go!
After submitting your request, simply wait for the store owner to approve it. I usually recommend sending them an email to let them know you've sent a request, so they can check their inbox and grant access promptly—allowing you to get started as soon as possible!
Tips for Shopify partners!
Whether you're new to being a Shopify Partner or an experienced pro, we highly recommend exploring the Pent Library app. It streamlines the process of building custom theme sections for your clients, helping you significantly reduce development time. Plus, we offer an affiliate program for Shopify Partners—don’t hesitate to reach out and learn more!
