Shopify how to assign template to page - 2025 Guide
Learn how to assign templates to pages in Shopify to customize your store's design and functionality.

Assigning the right template to a page in Shopify is a simple yet powerful way to customize the look and functionality of your store. Whether you're creating a unique landing page, customizing a product page, or designing a blog layout, templates give you the flexibility to tailor your store to your brand's needs. In this guide, we'll walk you through the process of assigning a template to a page in Shopify step by step, helping you make your store stand out and deliver a seamless shopping experience. Let's get started!
How to apply a template to a page step by step
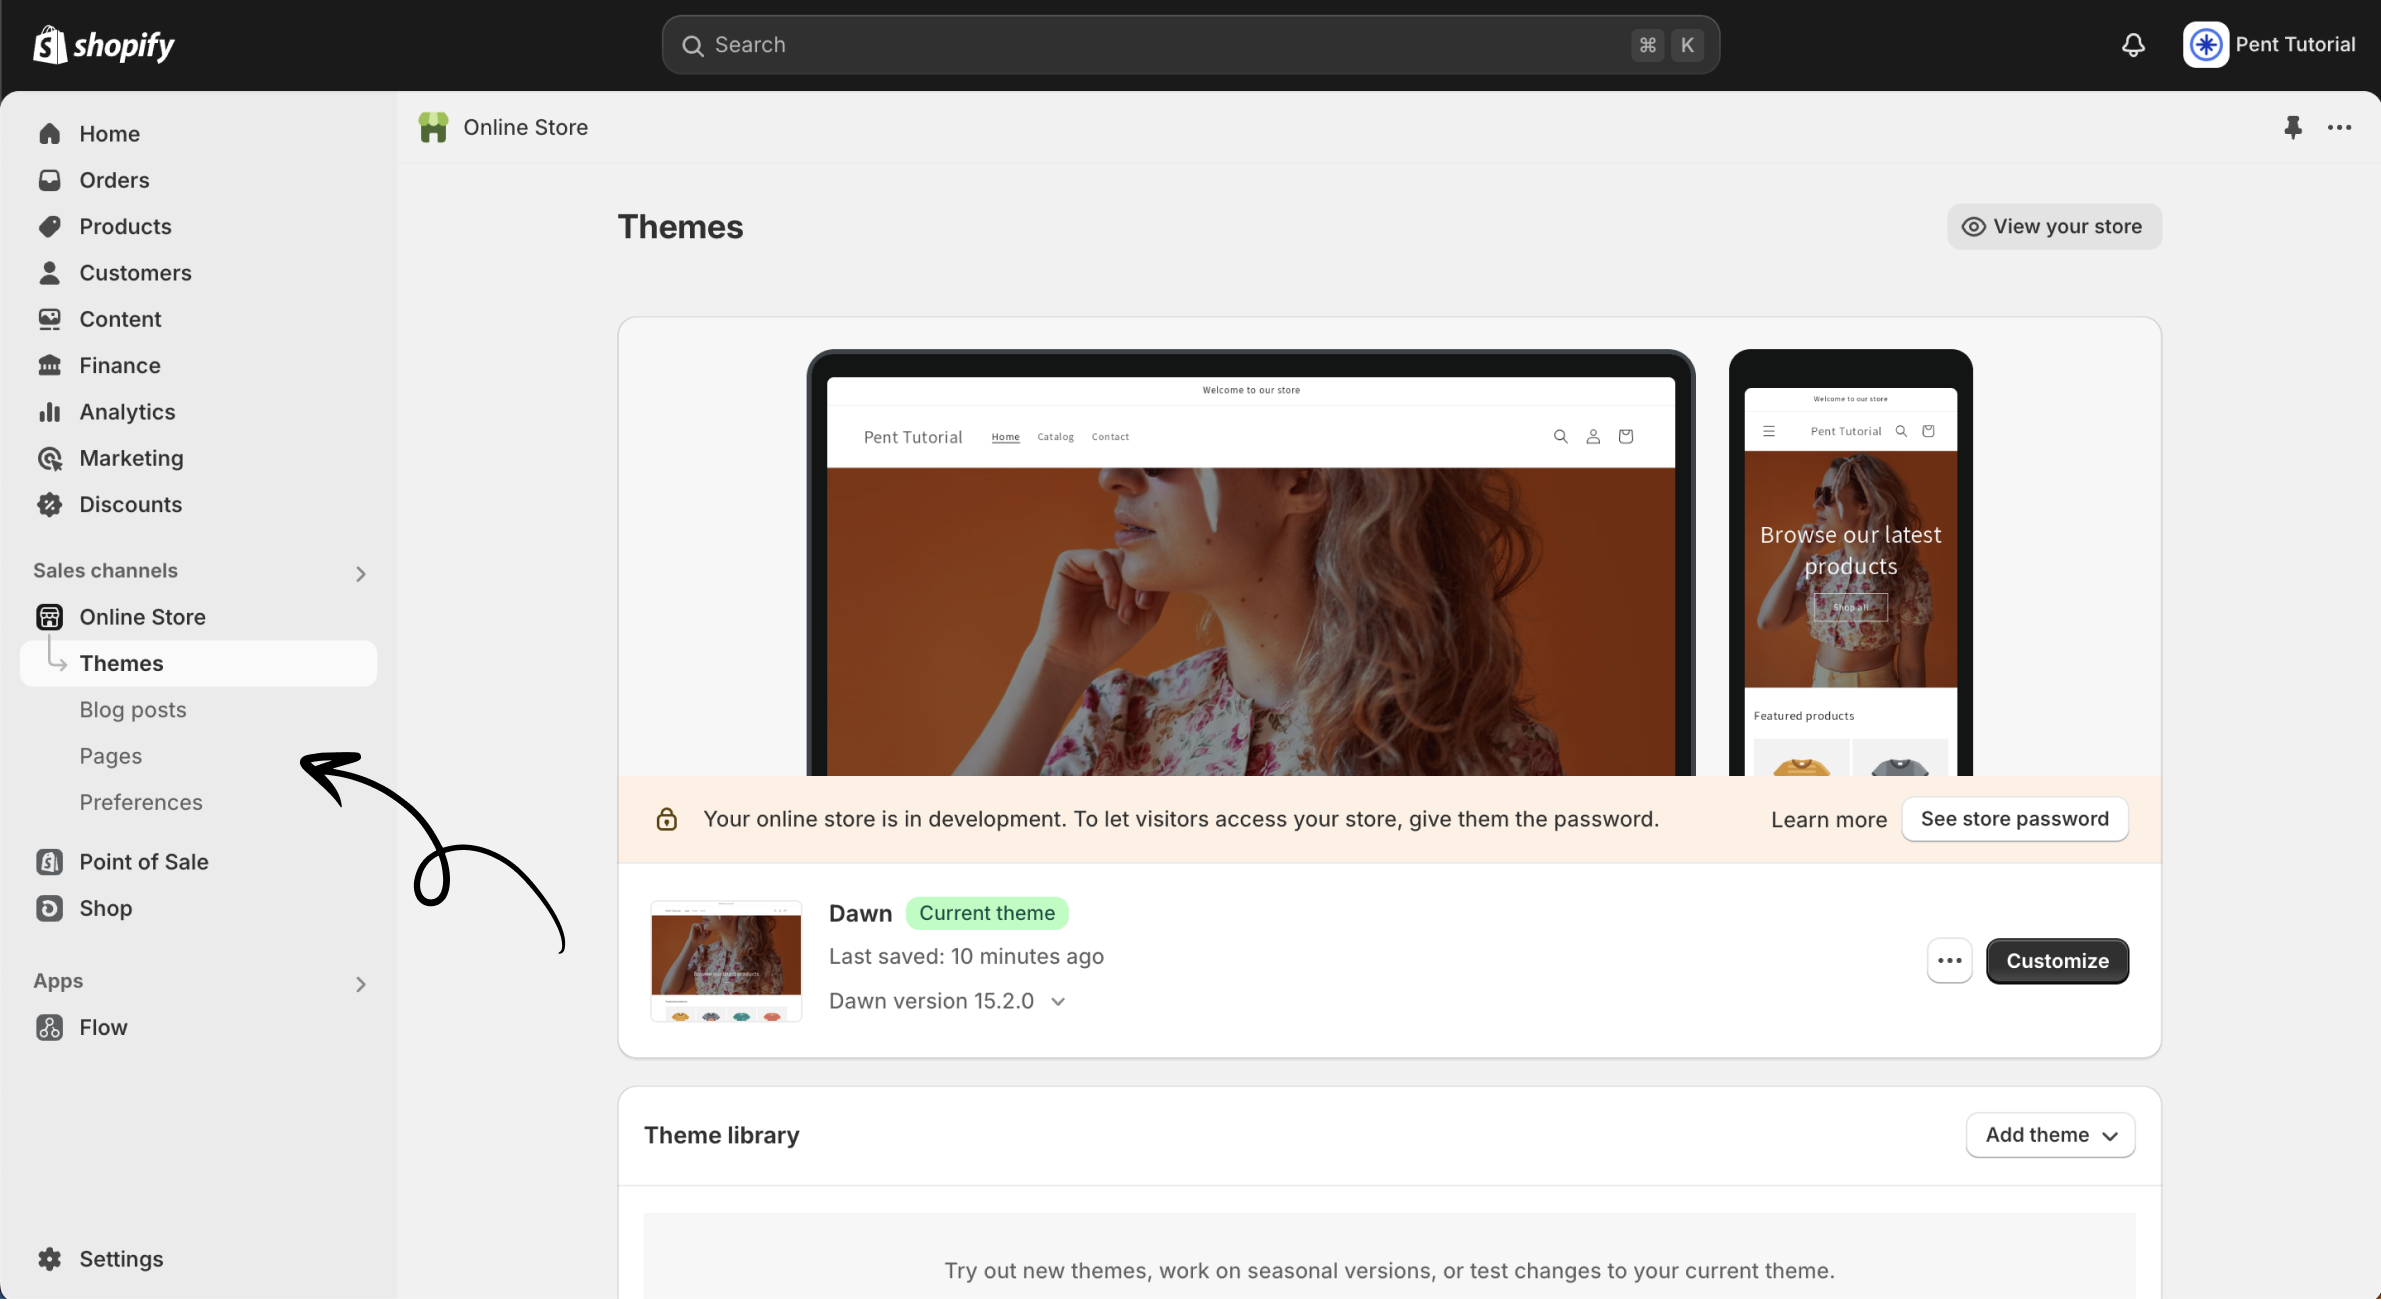
Step 1 - Go to pages in the Shopify admin
Start by navigating to the Pages section in your Shopify admin. Here, you can view all the pages you've created or create a new page if needed!

Step 2 - Click the page, or create a new one
Once you're in the Pages section of your online store, you'll see a list of all the pages you've created. Click on the page that you want to apply the template to, If you'd like to create a new page and apply your template, you can do that here too!

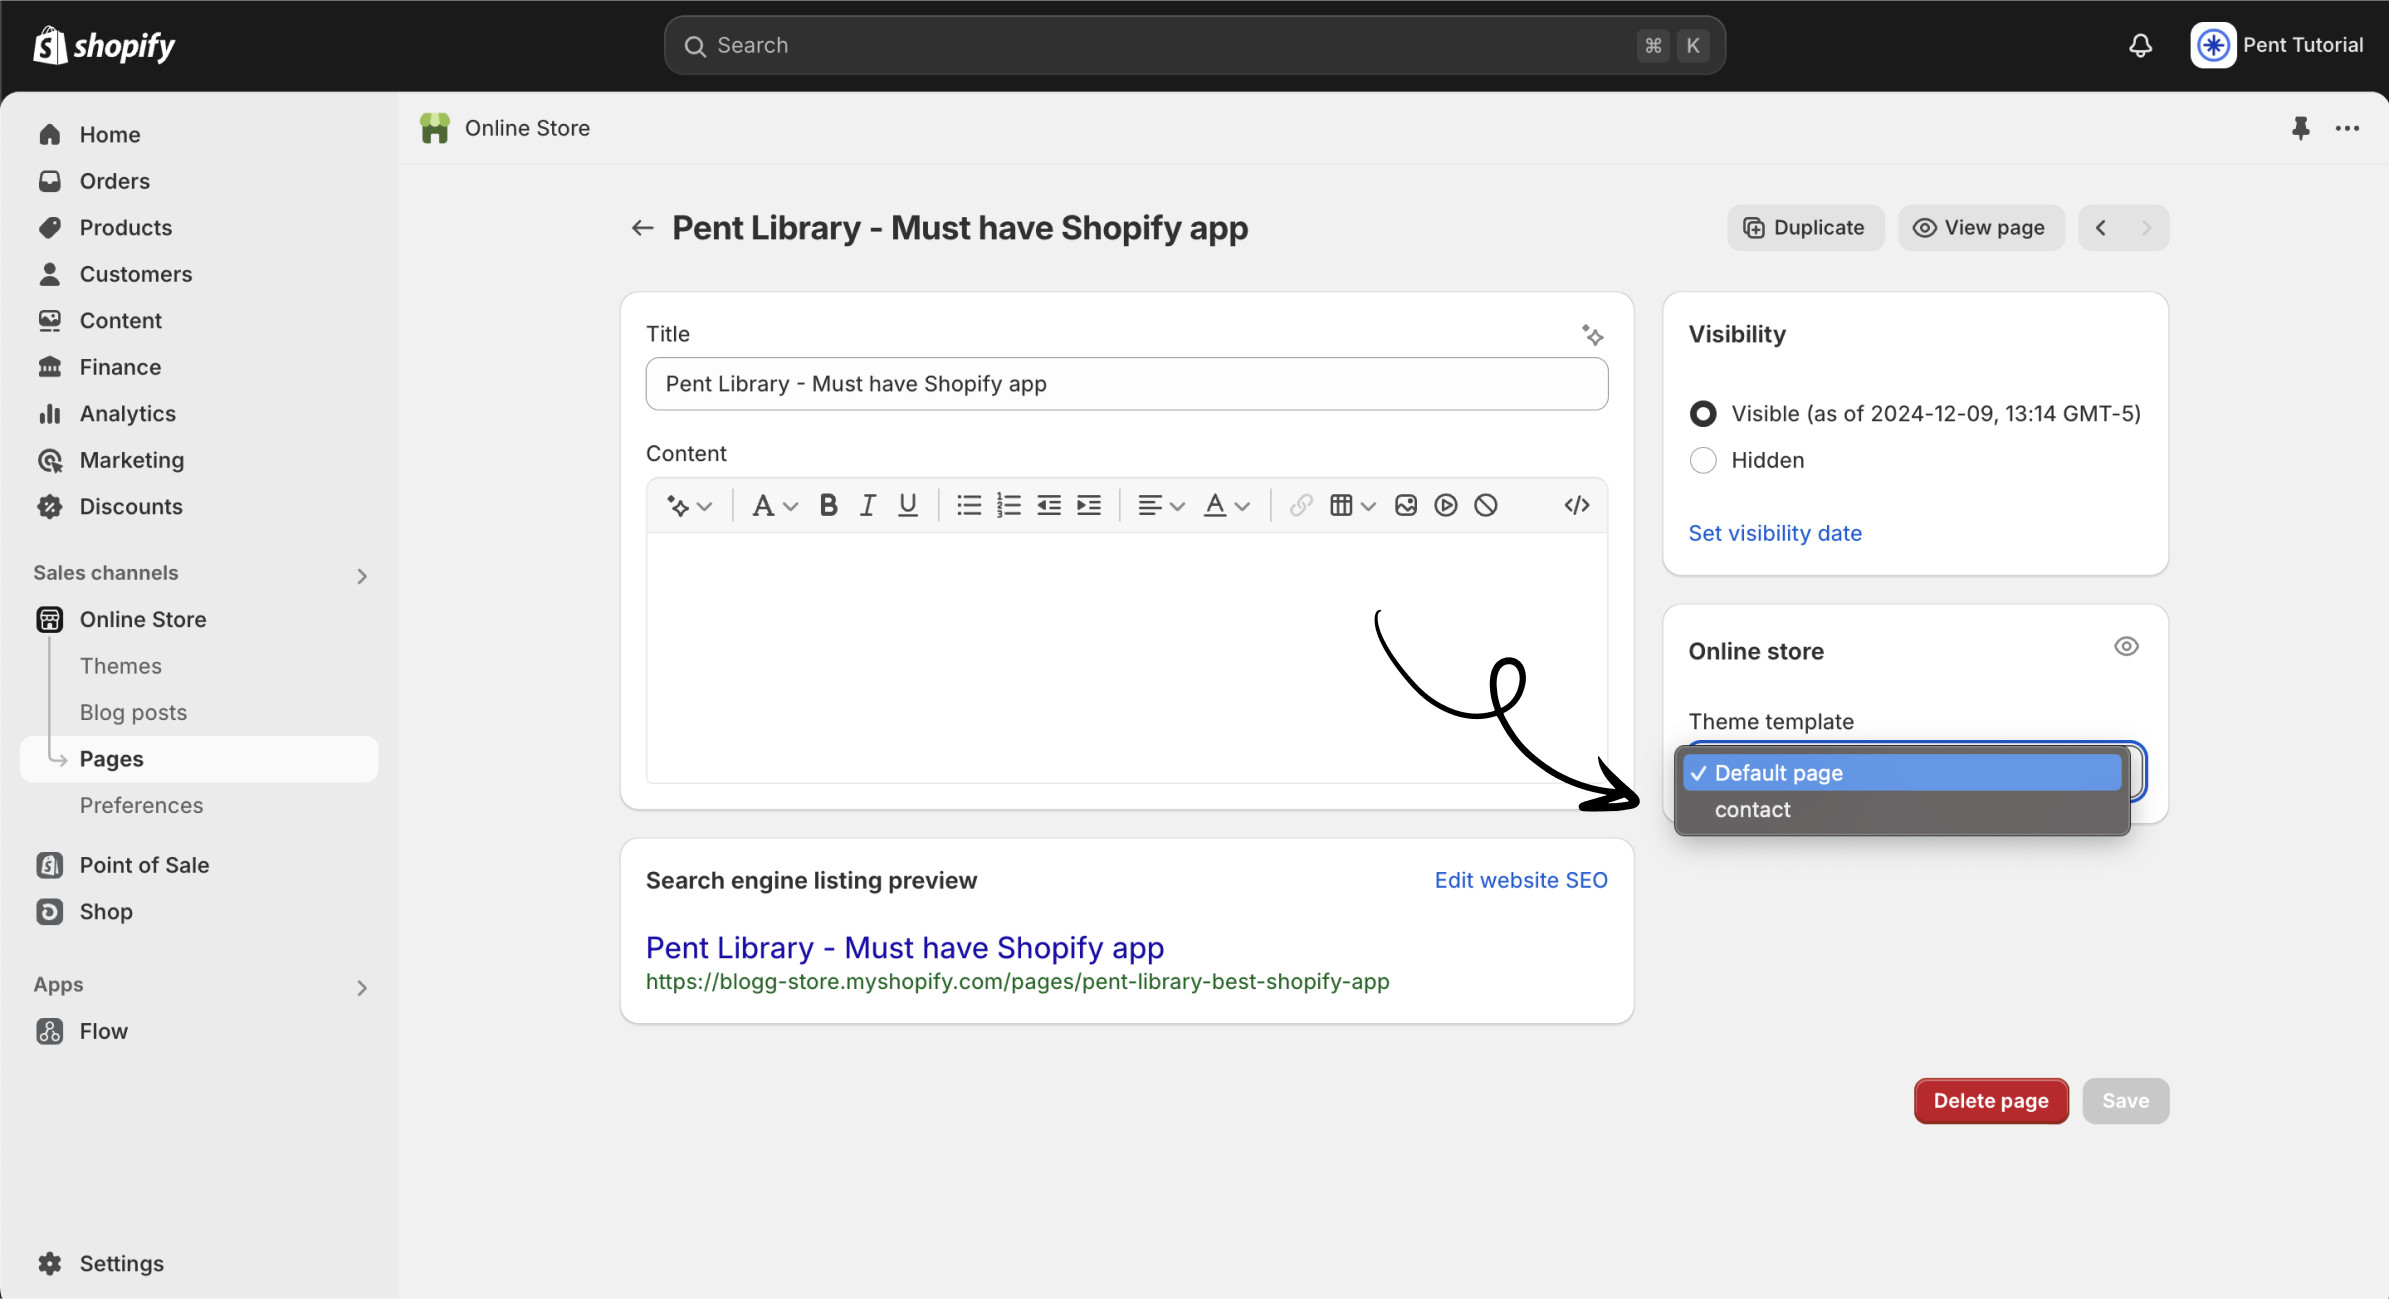
Step 4 - Apply the template to the page
After selecting the page you want to edit or creating a new one, you'll be directed to the individual page editor. Here, you can choose from the templates you've created for your Shopify theme. Select the template you prefer, click save, and you're all set—great work!

Easily create new templates with Pent Library
To create stunning, custom page templates for your Shopify store that perfectly match your brand, check out Pent Library. This Shopify app lets you seamlessly use pre-built theme sections crafted by professional developers, making it quick and easy to enhance any Shopify 2.0 theme. Want to learn more? Click here!
